Getting started
RDM's Fleet Management Suite can be installed on any Windows or Linux web server running a supported PHP release (PHP 8.4 or 8.5). It requires rdmBuild to be installed on the MultiValue server where the API endpoint is hosted.
Schedule Manager introduction
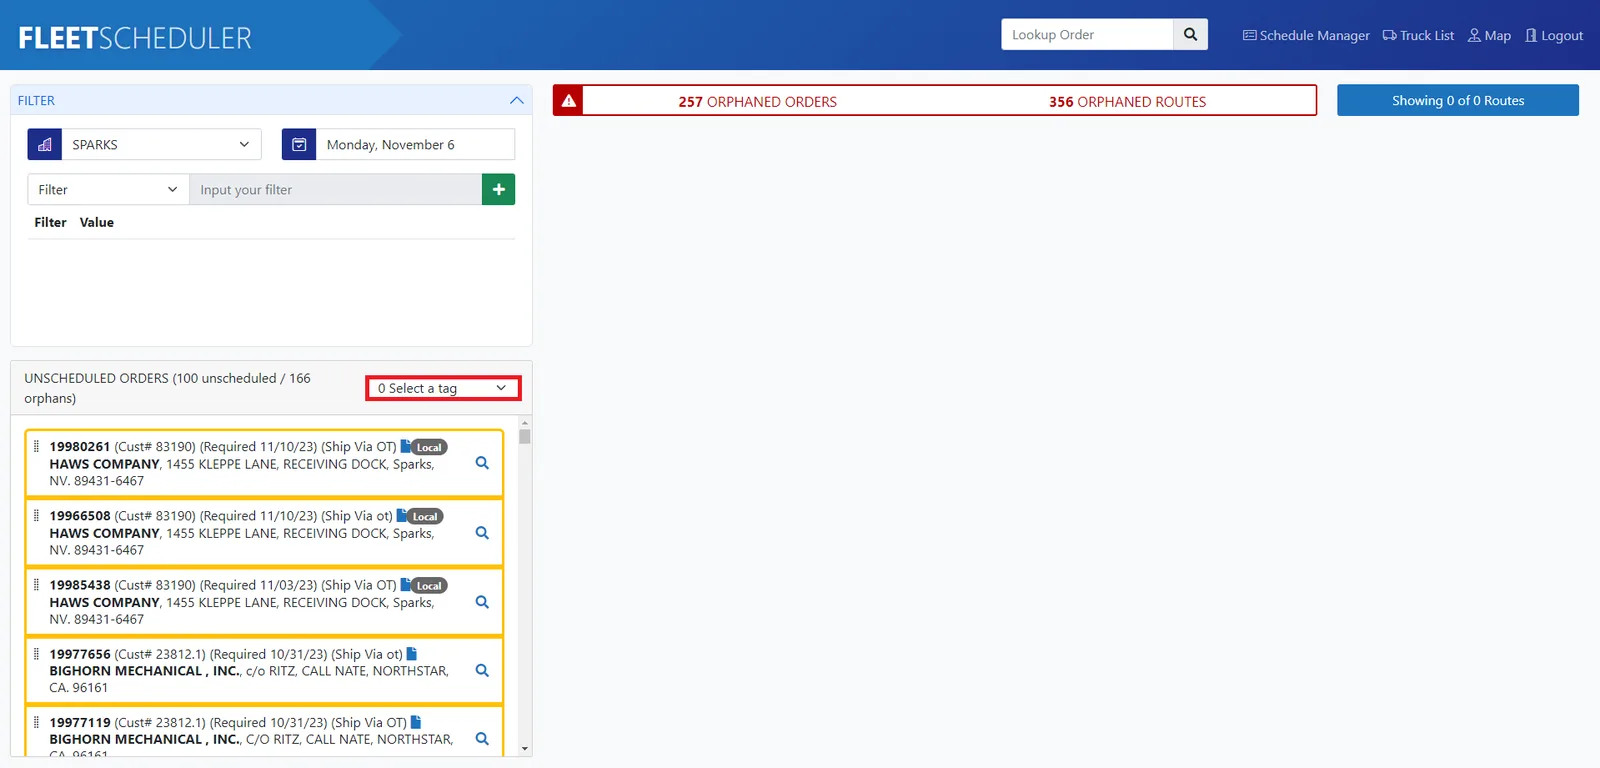
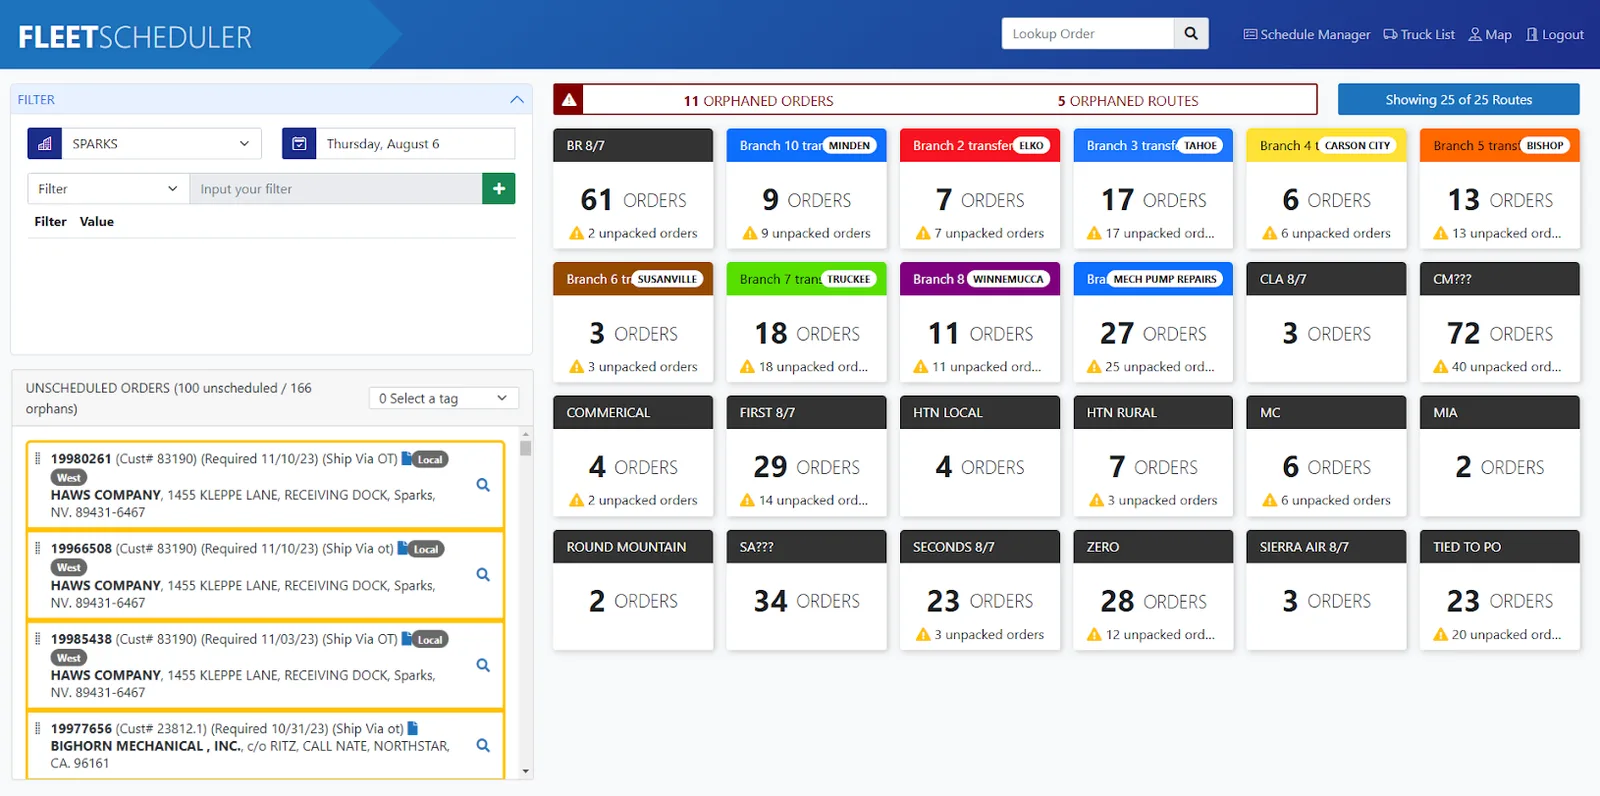
The coloured squares below match the coloured outlines in the screenshots.
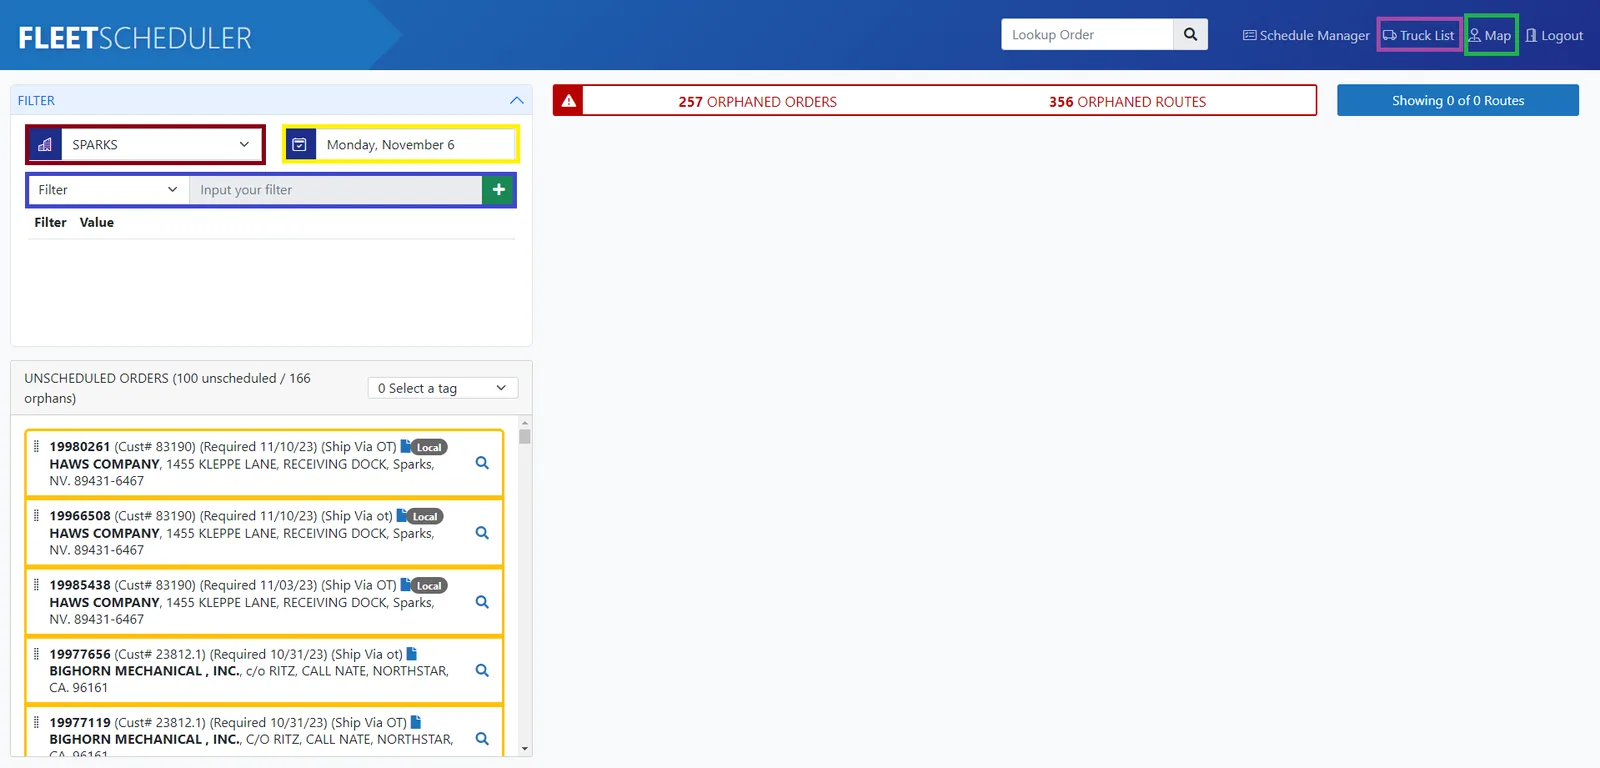
- Location: Drop-down of locations of origin.
- Date: Date currently being scheduled for.
- Filter: Drop-down of possible filters for UNSCHEDULED ORDERS:
- Order Number
- City
- Zip Code
- Customer Number
- Customer Name
- Tag
- UNSCHEDULED ORDERS: List of all unscheduled orders currently in the system.
- Truck List: Displays a list of all available trucks and their statuses.
- Map: Takes you to a map view where orders can be displayed visually on a map.
Adding routes
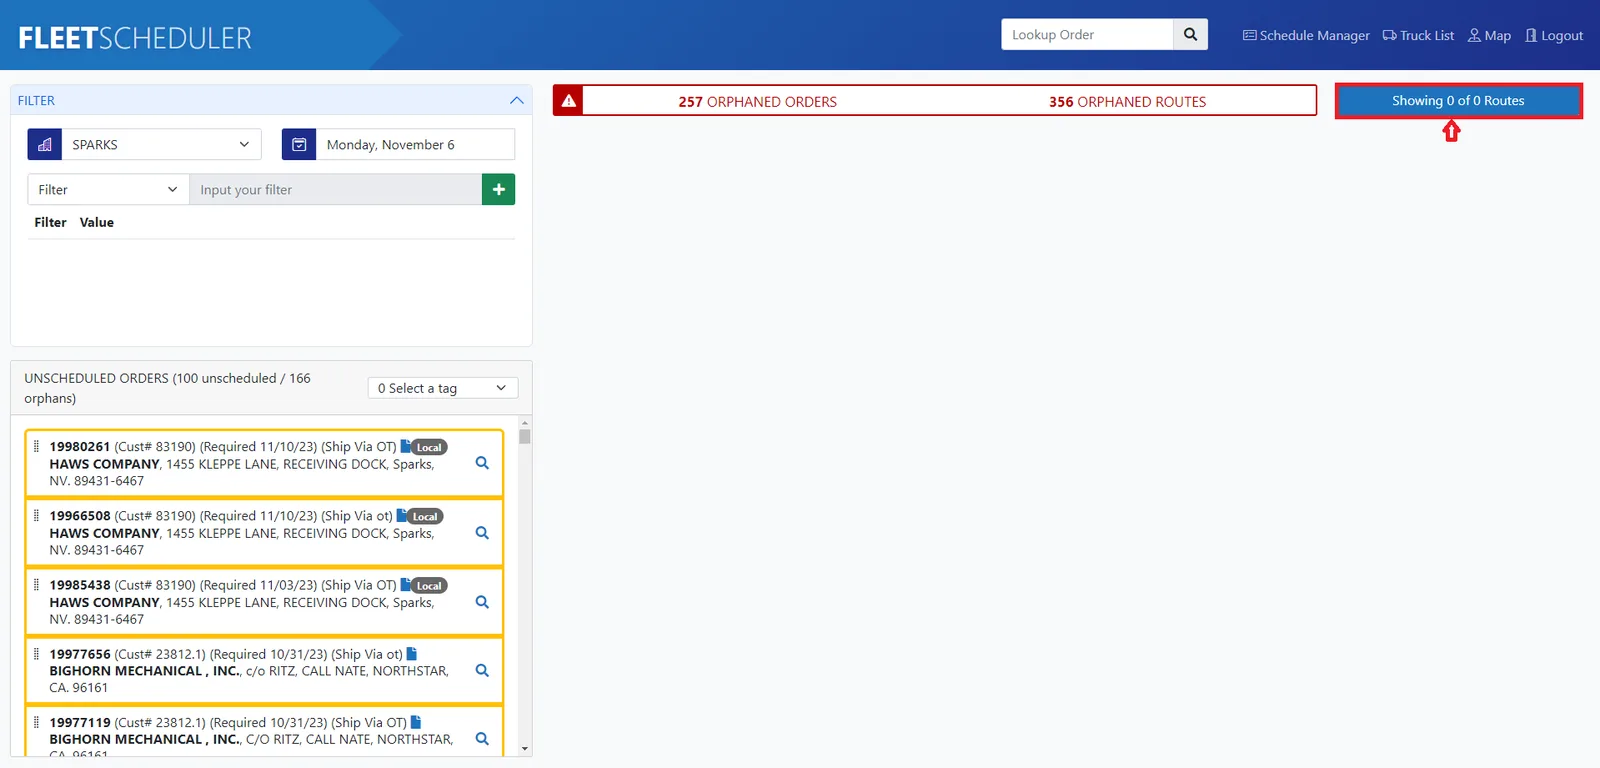
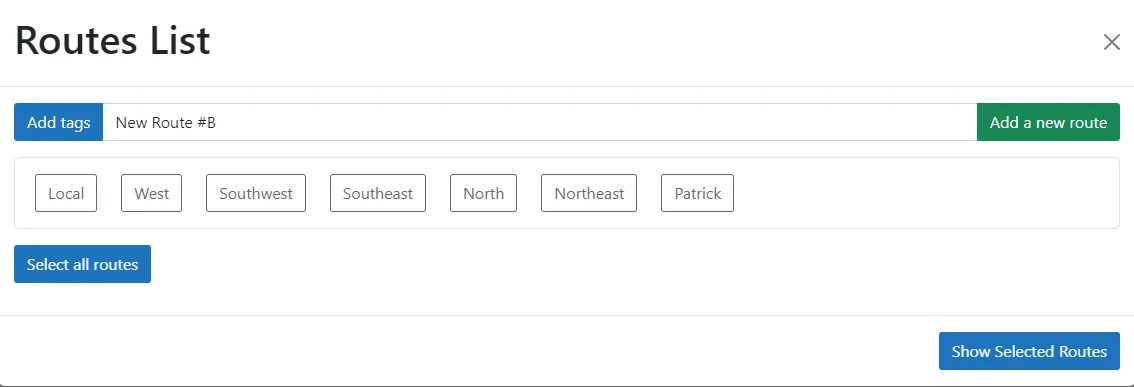
- Click "Showing # of # Routes". A pop-up will come up.
- Enter the route name in the text box to the right of the "Add tags" button.
- Apply any tags from the ones listed below the text box. If no tags are present, click the "Add tags" button.
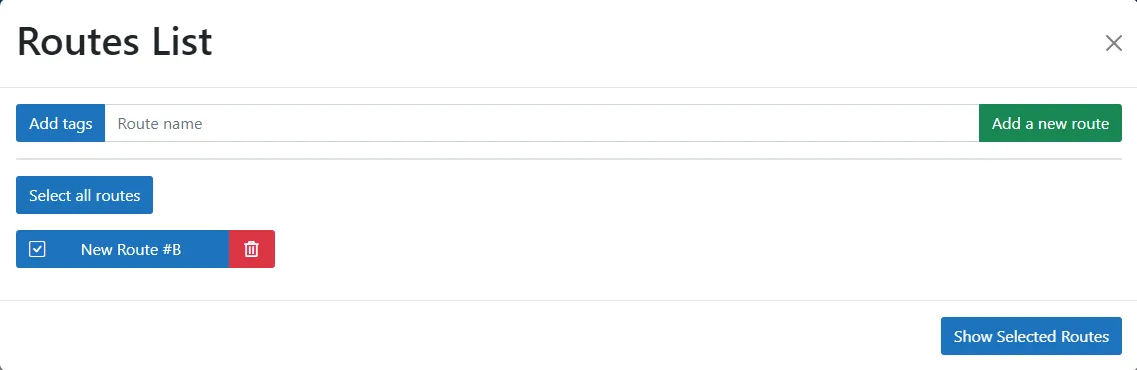
- Finally, click the green "Add a new route" button. The route will drop down and become selectable.
- To add it to the Schedule Manager, check the tick box next to the route and click the "Show Selected Routes" button.
- Click "X" at the top of the pop-up, or outside of the pop-up, to return to the Schedule Manager.
Viewing orders
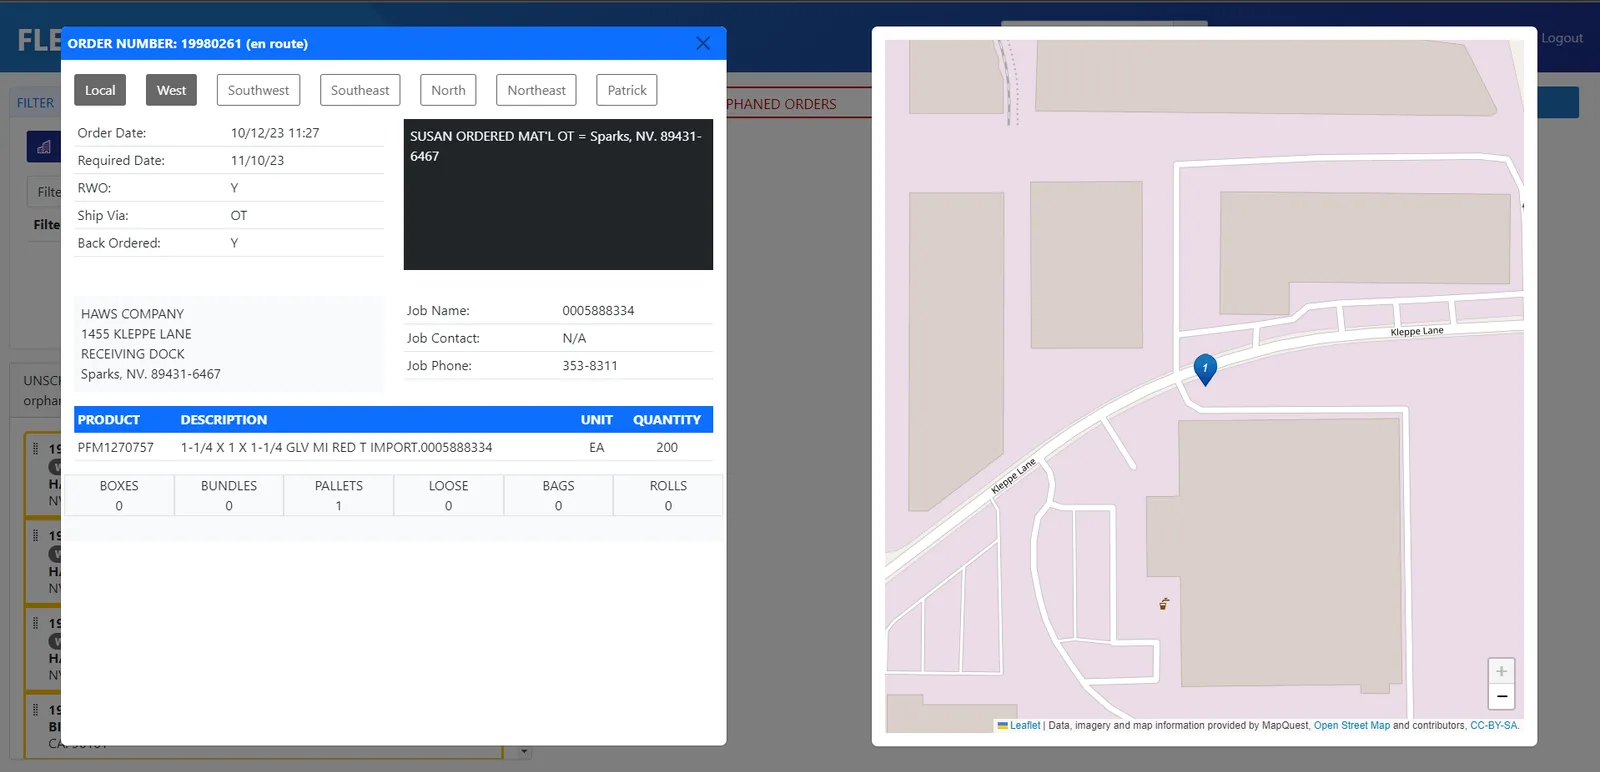
Click an order in the "UNSCHEDULED ORDERS" section. The order screen will open. Here you can find the following information pertaining to the order:
- Tags (these can be edited here)
- Order Date
- Required Date
- Backordered status
- Address
- Job Name
- Job Contact
- Job Phone
- Products contained in order
- Packaging
- Map with location marked (the map is interactive for zooming in/out)
Click "X" to return to the Schedule Manager.
Adding orders to routes
- Filter orders by Tag with the drop-down.
- Find the order you want to route in UNSCHEDULED ORDERS.
- Click and drag the order to the route you would like.
- The route's number of orders will update.
- The order will disappear from UNSCHEDULED ORDERS.
Viewing and modifying routes
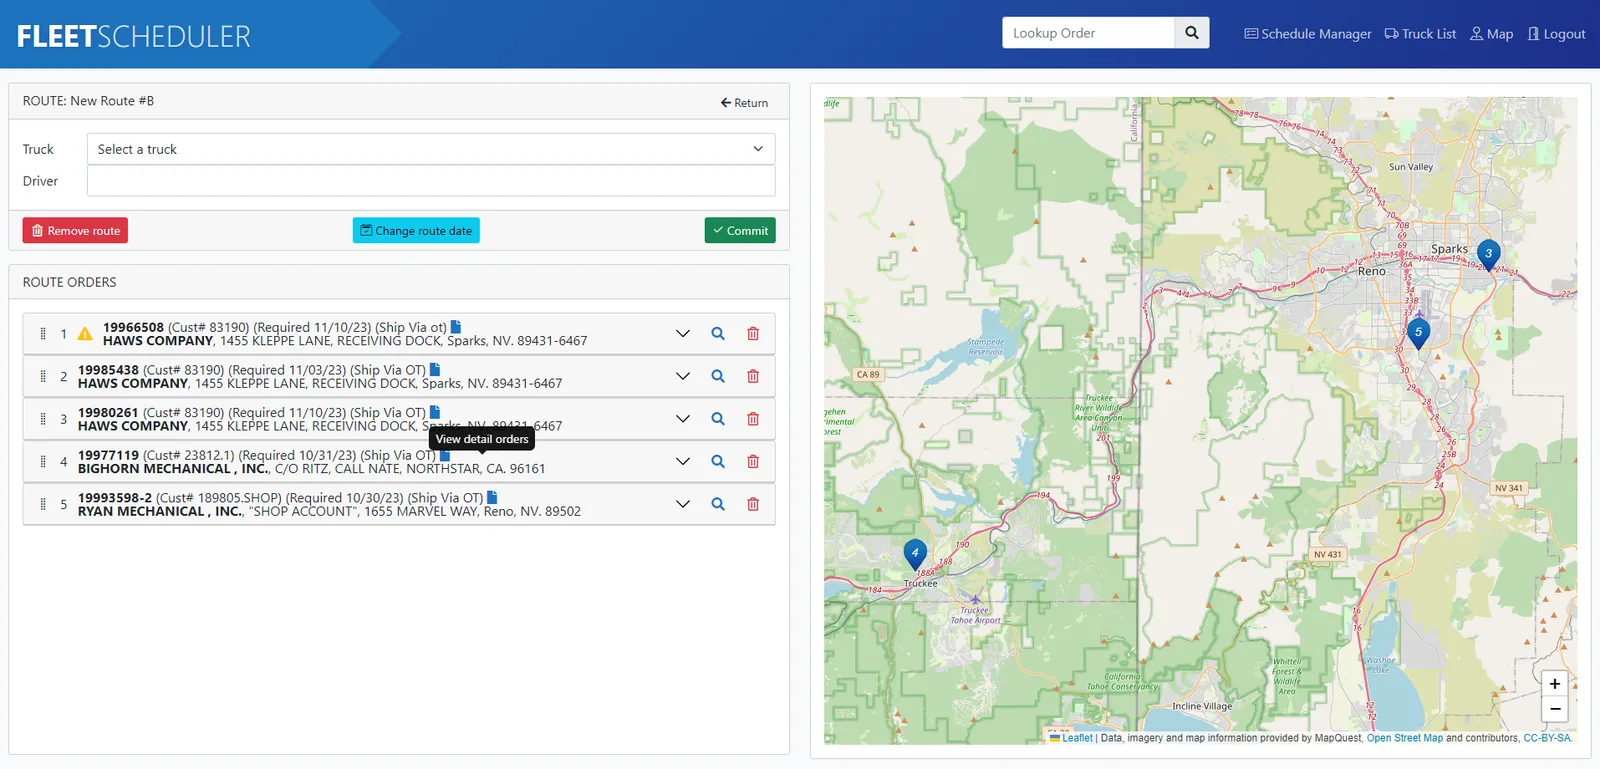
To view a route, click on it in the Schedule Manager. A new page will open with the route information.
Modifications possible on the route page:
- Select a truck: Drop-down of all trucks available to place a route onto.
- Driver: Text box to assign a driver to the truck selected above.
- Remove route: Removes the route from the schedule.
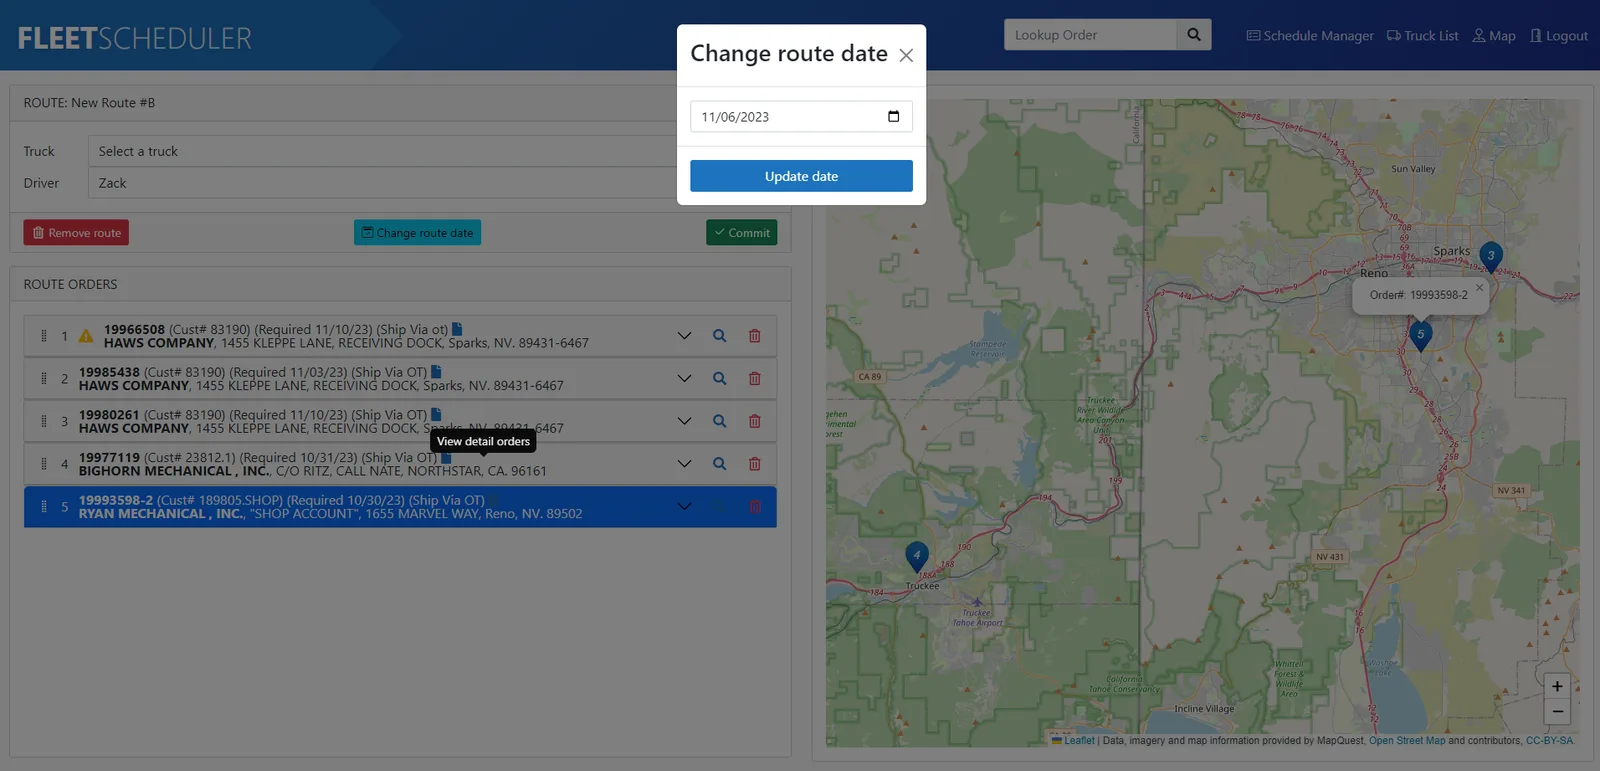
- Change route date: Changes the date the route will be scheduled for. A pop-up will appear and allow you to enter the new date.
- Reorder and remove orders from the route.
- The map view shows the orders and where they are on the route. This allows for more efficient routing.
- The magnifying glass allows for viewing order specifics.
Once the truck is selected, the driver assigned and the orders placed in their correct delivery order, click the "Commit" button. This will remove the route from the Schedule Manager. To view it beyond this step you must go to the "Truck List".
Truck List
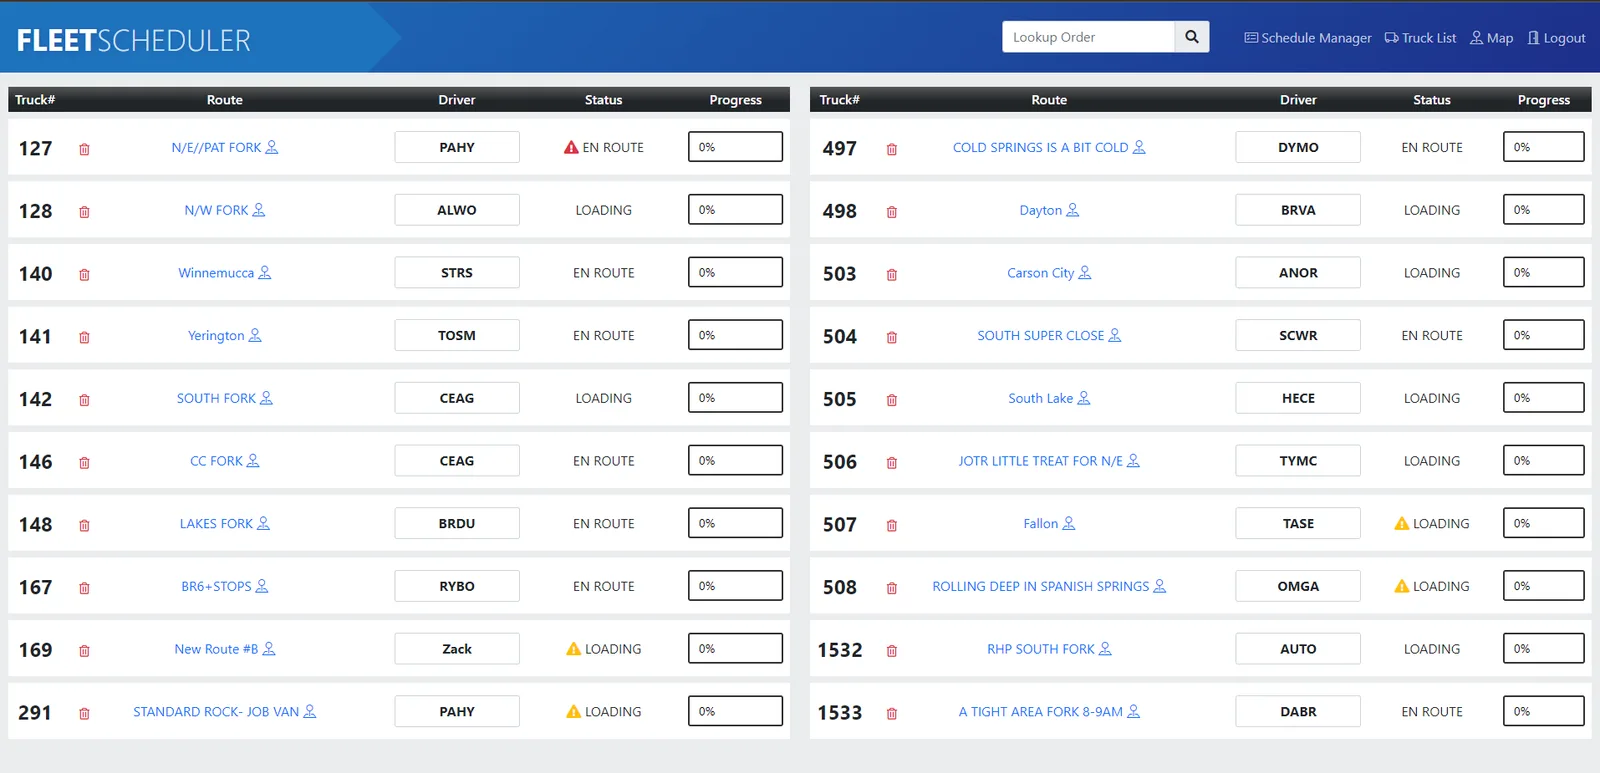
The Truck List page shows a list of all trucks that have been assigned a route.
Truck information included on the Truck List:
- Truck Number
- Route Assigned
- Driver Assigned
- Route Status
- Route Progress
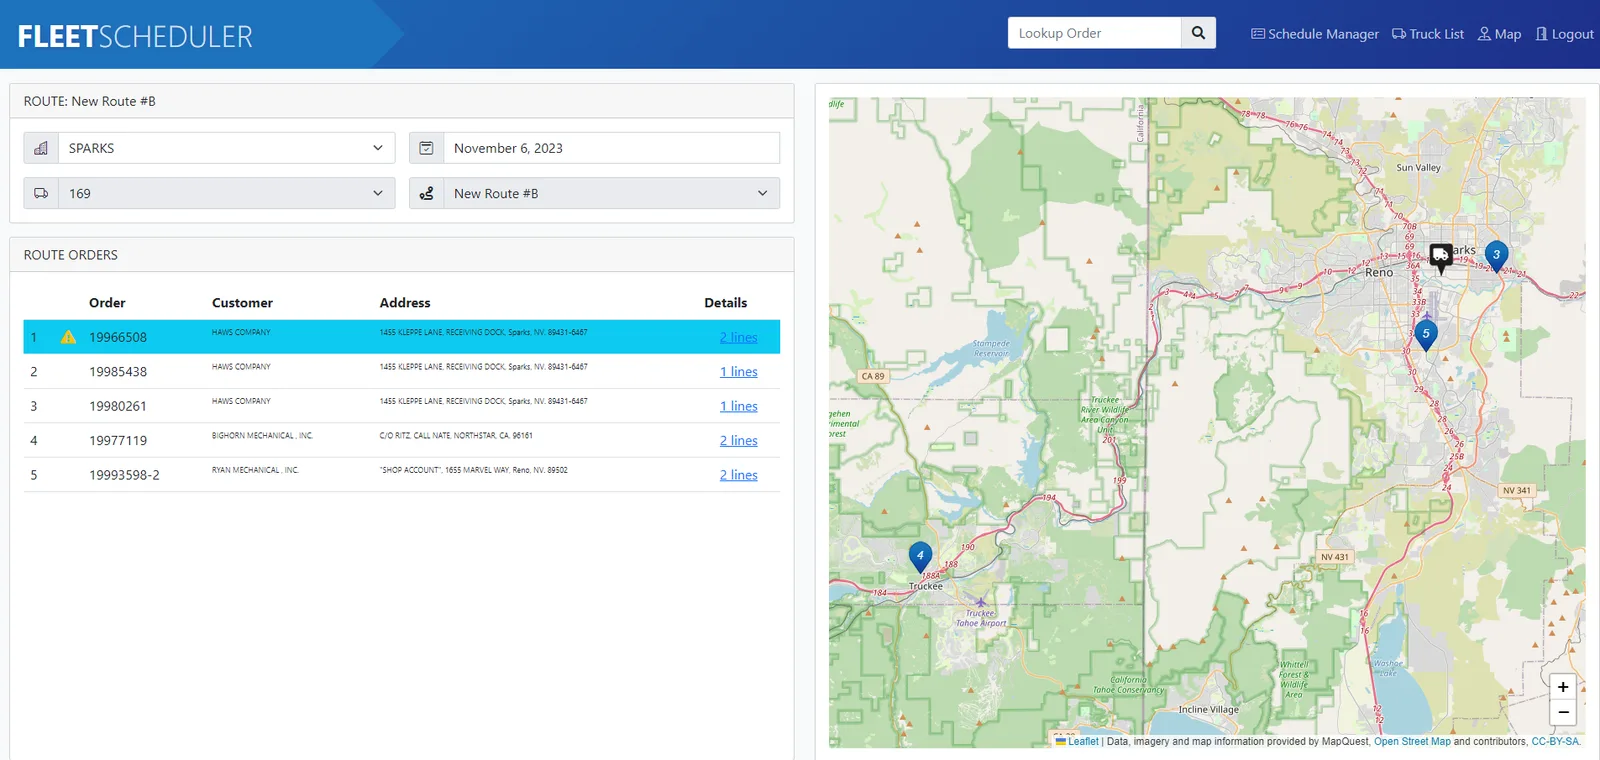
When you click on the linked route, it will open a new Route information window, which will show the following information:
- Route Origin
- Route Date
- Truck Number
- Route Name
- Route Orders (route information included):
- Order Number
- Customer Number
- Address
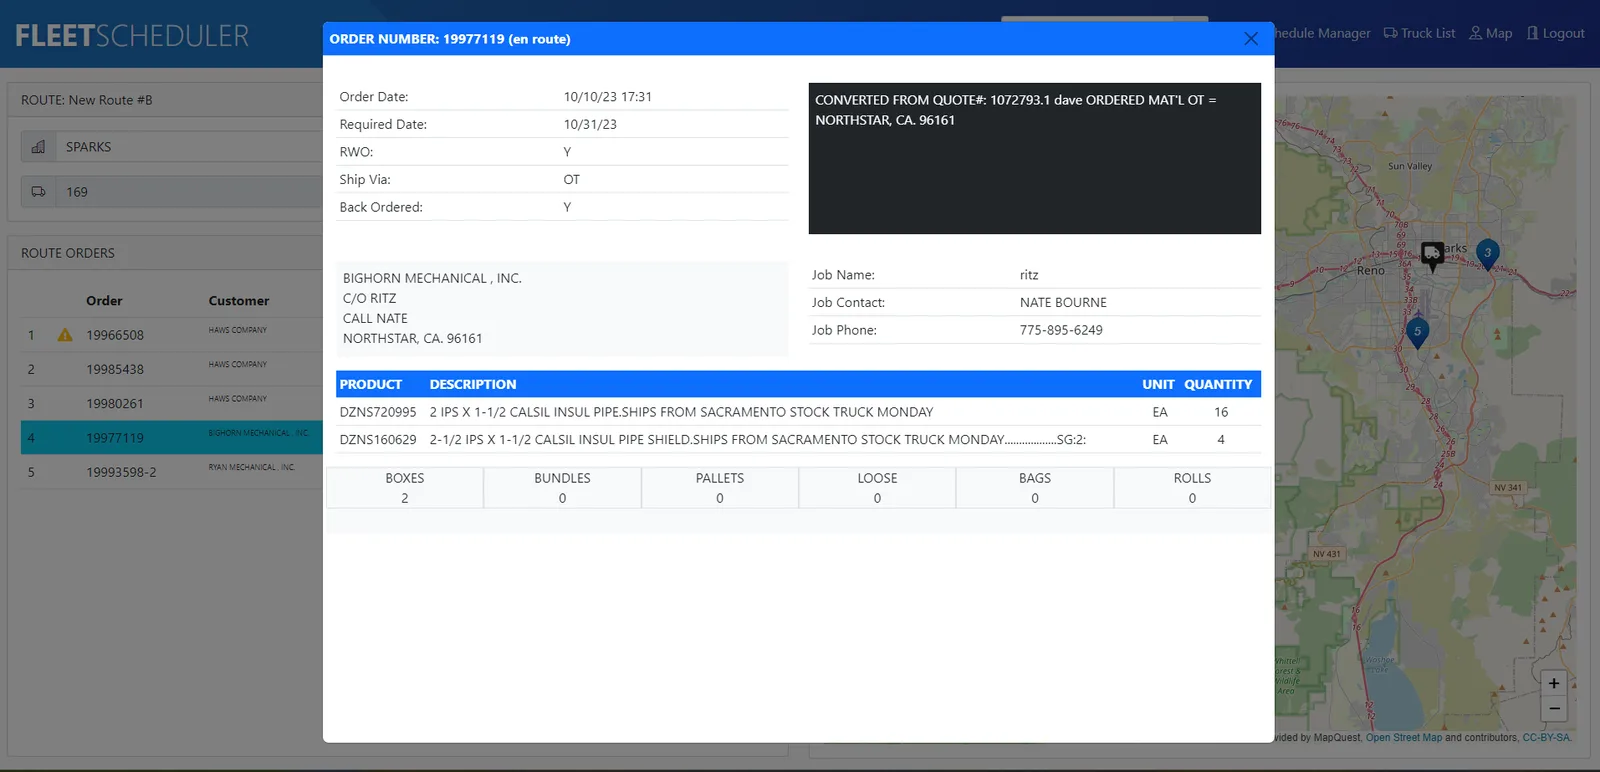
- Detail link with the number of lines for each order. Clicking the link will open a new order details window (this is informational only, no editing).