
RDM Web Term is a browser-based terminal emulator for MultiValue (Pick-family) host systems, plus two host-integrated productivity features: WCE (an in-browser code editor for MV BASIC/proc source) and WTD (browser-driven data upload/download between the host and your PC). This document covers every screen, setting, and feature of the package — both the web front-end and the MultiValue host-side programs it talks to. For a product overview, see the WebTerm product page.
Overview
WebTerm is a self-contained package (the server folder) that you copy to, or run on, a machine reachable by your users' browsers. Once running, users browse to it and get a full terminal session to a MultiValue host over Telnet or SSH — no client software to install for the terminal itself. Two optional companion pieces round it out:
- A small desktop helper app, RDM Host Tools, for the handful of things a browser can't do on its own (opening a local file or sending a print job to a local printer from a host-driven action). See Section 8.
- An admin Dashboard page for monitoring active sessions across all users and jumping into any of them to watch or co-drive live. See Section 6.
A typical session: open WebTerm in a browser, either pick a saved profile from the Session field or fill in Host/Port/Protocol/Terminal Type by hand, click Connect, and you're at your host's login prompt. From there the host can drive two extra browser-side features on demand — WCE (opens host BASIC/proc source in an in-browser code editor) and WTD (prompts you for a file to upload, or hands you one to download) — both covered in their own sections below.
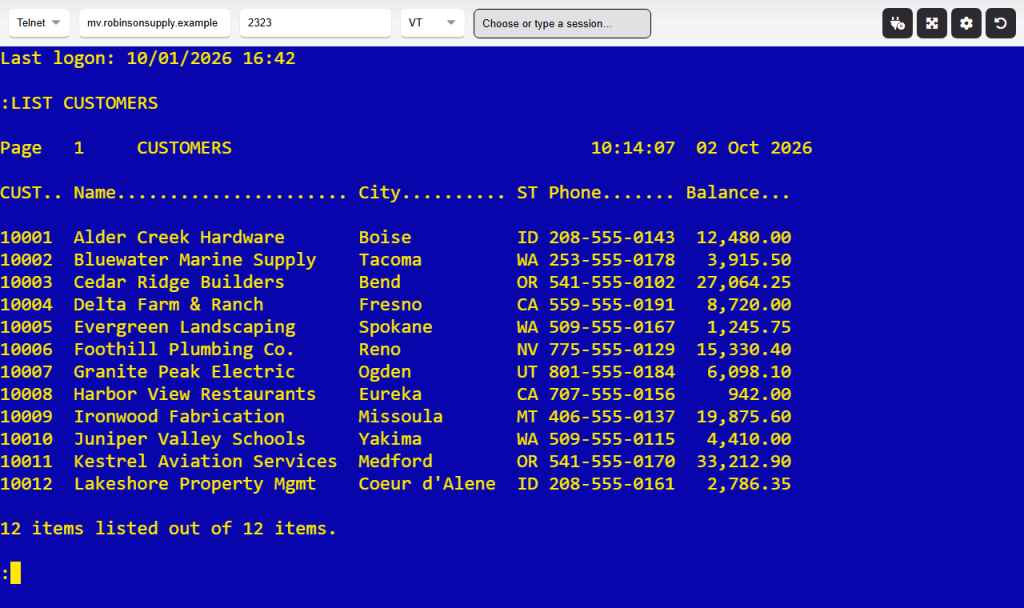
The Terminal Screen
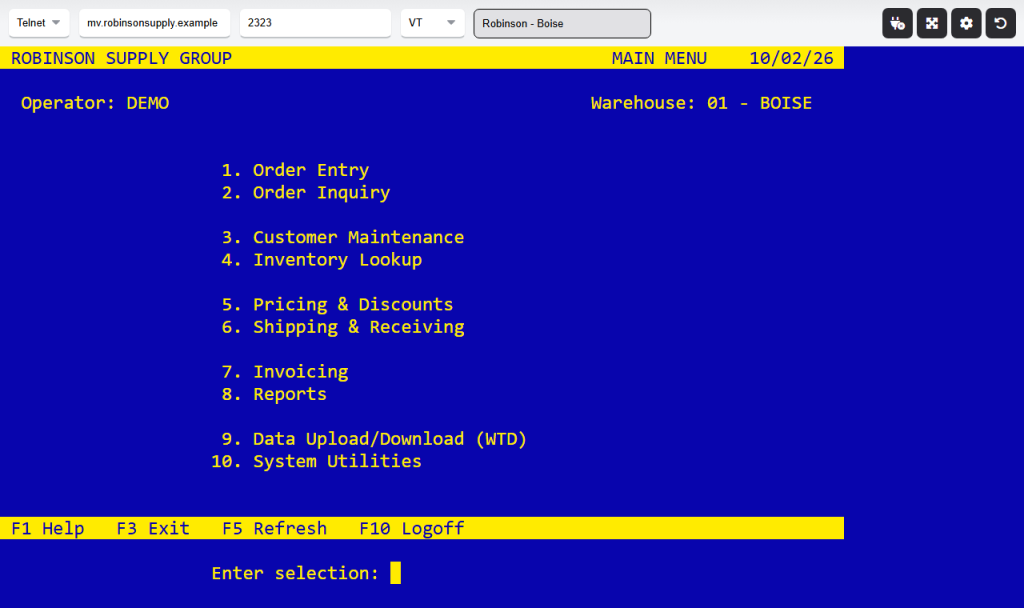
Toolbar — left side
| Control | Description |
|---|---|
| Protocol | SSH or Telnet — which wire protocol to use to reach the host. |
| Host/IP | Hostname or IP address to connect to. Press Enter to move to the Port field. |
| Port | TCP port to connect on. Press Enter here to connect immediately. |
| Terminal Type | VT (VT100/xterm), WYSE, or ADDS — which terminal emulation WebTerm should translate the host's control codes as. Press Enter here to connect immediately. |
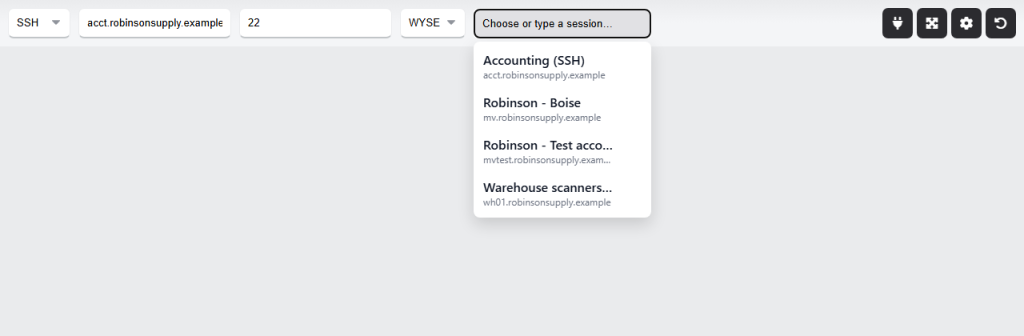
| Session | The session-profile picker — type a new name to define a new profile, or click it to open a dropdown of your saved profiles. See Section 4. |

Toolbar — right side (icon buttons)
| Icon | Tooltip | Description |
|---|---|---|
| Plug | Connect / Disconnect | Connects using the current Host/Port/Protocol/Terminal Type/Session settings; click again to disconnect. While connected, the icon changes to an "unplug" glyph; while WebTerm is automatically reconnecting after a dropped connection, it spins and reads "Reconnecting…". |
| Expand arrows | Toggle Terminal Size | Switches the terminal between 82 and 134 columns and re-fits the font to match — a display convenience only, it doesn't reconnect or change what the host thinks your screen size is. |
| Gear | Settings | Opens the Settings modal — see Section 3. |
| Undo arrow | Reset Terminal | Clears the screen and resets the local terminal display (buffer, any images left on screen, in-progress download state, size back to the default 82×24) without touching the actual host connection. |
| Hamburger | Toggle Menu | Shows/hides the whole toolbar to reclaim screen space. The toolbar also auto-hides on its own once the browser window narrows below about 820px, and auto-shows again above that width. |

Tandem badge
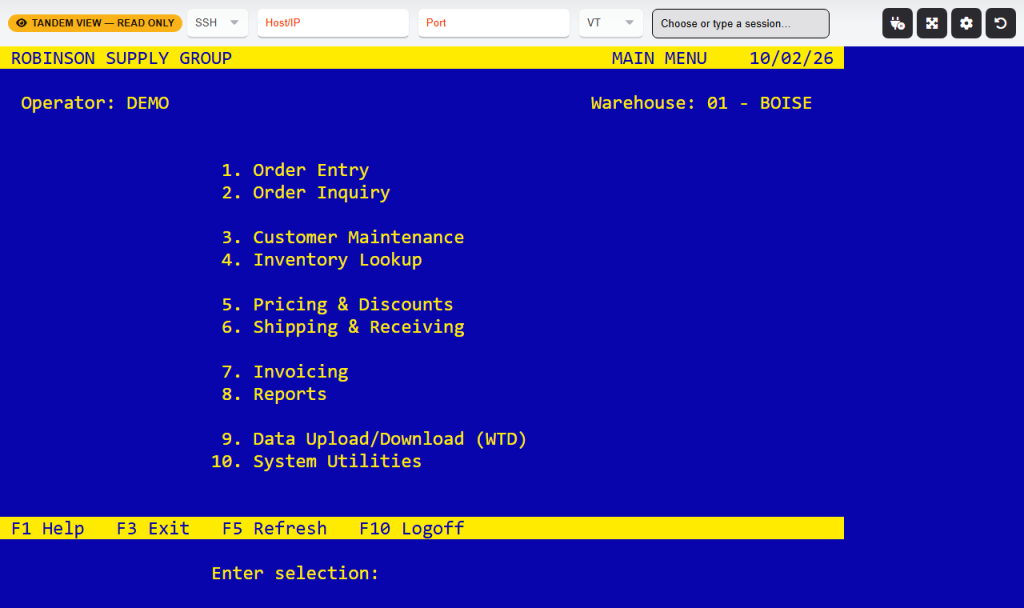
If you arrive at the terminal page via a Watch or Control link from the Dashboard rather than connecting yourself, a small badge appears reading either "👁 TANDEM VIEW — READ ONLY" or "⌨ TANDEM CONTROL — LIVE INPUT", and the connection fields are disabled since a tandem tab attaches to someone else's already-running session instead of starting its own. See Section 7.

Settings
Open the Settings modal from the gear icon. It has four tabs; Save writes everything in the modal (plus the toolbar's connection fields) into whichever profile name is currently in the Session field — so Settings values are really just extra fields on a session profile, not a separate global preferences store. If the Session field is empty, Save silently does nothing.
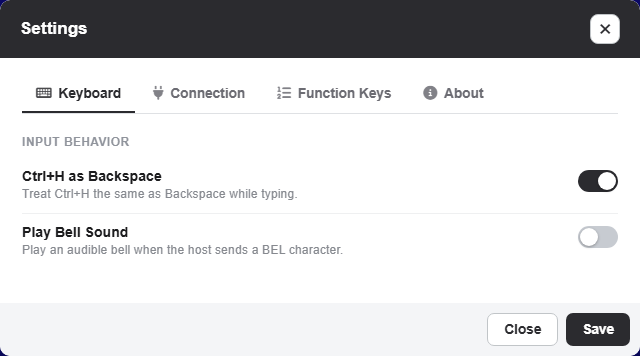
Keyboard tab (shown by default)
| Setting | Default | Description |
|---|---|---|
| Ctrl+H as Backspace | On | Treats Ctrl+H the same as Backspace while typing. |
| Play Bell Sound | Off | Plays an audible bell when the host sends a BEL character. |
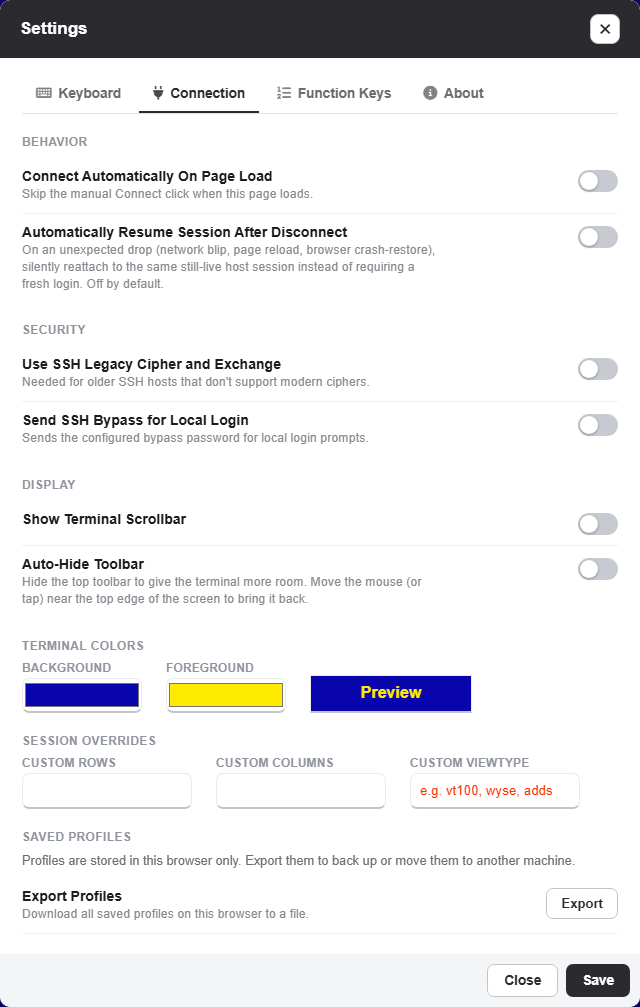
Connection tab
Behavior
| Setting | Default | Description |
|---|---|---|
| Connect Automatically On Page Load | Off | Skips the manual Connect click — WebTerm connects itself as soon as the page finishes loading. |
| Automatically Resume Session After Disconnect | Off | On an unexpected drop (network blip, page reload, browser crash-restore), silently reattaches to the same still-live host session instead of requiring a fresh login. Turning this off mid-session immediately discards any resume credential already held, so a later drop can no longer silently reattach. See Section 5. |
Security
| Setting | Default | Description |
|---|---|---|
| Use SSH Legacy Cipher and Exchange | Off | Needed for older SSH hosts that don't support modern ciphers. |
| Send SSH Bypass for Local Login | Off | Sends a configured bypass password for local login prompts. |
Display
| Setting | Default | Description |
|---|---|---|
| Show Terminal Scrollbar | Off | Shows/hides the terminal's scrollbar. |
Terminal Colors
| Setting | Default | Description |
|---|---|---|
| Background | #0805ad (dark blue) |
Terminal background color. |
| Foreground | #ffeb00 (yellow) |
Terminal text/cursor color. The text-selection highlight is derived from this color too. |
A live preview swatch next to the two color pickers updates immediately as you adjust either one. Clicking the swatch itself asks to reset both colors back to their defaults.
Session Overrides
| Setting | Default | Description |
|---|---|---|
| Custom Rows / Custom Columns | Blank (24×82) | Override the terminal size sent to the host at connect time. |
| Custom ViewType | Blank | Send an arbitrary terminal-type string to the host instead of being limited to the VT/WYSE/ADDS dropdown. |
Function Keys tab
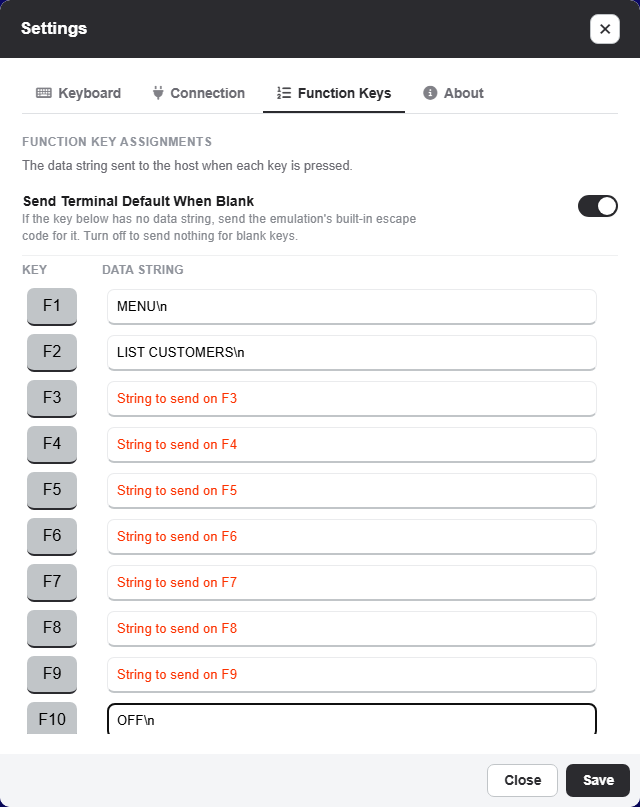
One row per key — F1 through F12, plus End — each a text field for the literal string or escape sequence to send to the host when that key is pressed. All blank by default. Use \n (or the older Accuterm-style ^M) in a value to embed a carriage return.
| Setting | Default | Description |
|---|---|---|
| Send Terminal Default When Blank | On | Controls what happens for a key with no data string. On, pressing it sends the active emulation's built-in escape code for that key (see Section 9) — same as a physical terminal. Off, pressing it sends nothing at all. |
About tab
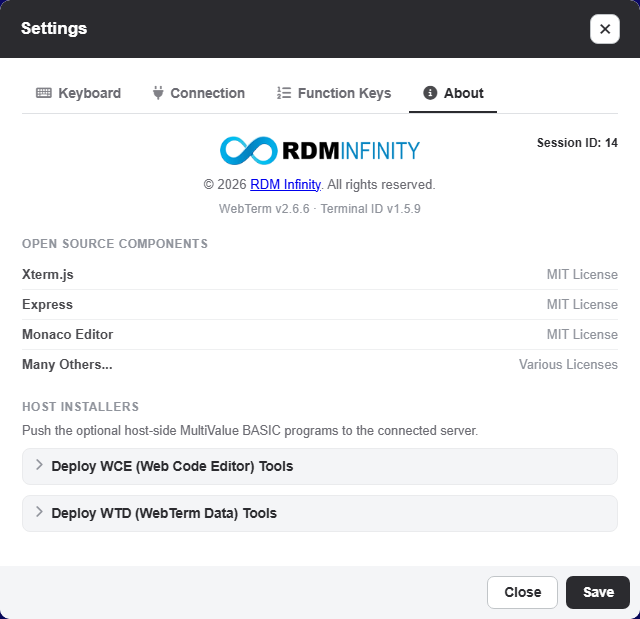
Shows the RDM Infinity logo/copyright, the running Version number, the current Session ID (handy if you need to reference a specific session with support or in the Dashboard's session table), and open-source attributions.
Two collapsible sections near the bottom let you install the MultiValue host programs the terminal integrates with, straight from the browser — see Section 12:
- "Deploy host tools to remote server" — installs WCE.
- "Deploy WTD (WebTerm Data) tools to remote server" — installs WTD.
Session Profiles
A profile bundles up everything on the toolbar and in every Settings tab — connection details, keyboard/security/display options, colors, row/column overrides, and all thirteen function-key strings — under one name, so you can switch between different hosts/setups instantly instead of re-entering everything each time.
- Saving: fill in the Session field and whatever else you want remembered, then click Save in the Settings modal. If the name matches an existing profile it's updated; otherwise a new one is added.
- Loading: click the Session field to open a dropdown of your saved profiles (name + host shown for each); type to filter the list live. Selecting one fills every field from that profile. If you're currently connected, you're asked first whether to disconnect. If "Connect Automatically On Page Load" is on, selecting a profile connects right away.
- Deleting: each row in the dropdown has a small delete (✕) button; it asks for confirmation and removes the profile immediately — there's no undo and no bulk-delete screen.
Profiles are stored in your browser (not on the server), so they're local to whichever browser/machine you saved them from.
Exporting and Importing
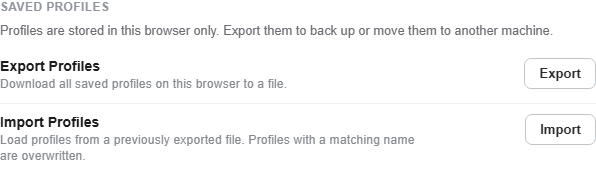
Since profiles live only in your browser, Settings → Connection → Saved Profiles lets you move them to another machine or back them up to a file:
- Export — downloads every saved profile on this browser to a single file (
webterm-profiles-<date>.wtprofiles). The file's contents are encoded (not plain, readable JSON) so a stray glance in a text editor doesn't expose hostnames or any passwords saved in your function-key strings — this is obfuscation for casual readability only, not encryption, so still treat the file as sensitive. - Import — pick a previously exported
.wtprofilesfile. WebTerm shows how many profiles are new versus how many already exist under the same name before doing anything; confirming overwrites any same-named profile and adds the rest, leaving every other existing profile untouched.
Session Resume
Every time you connect, the server gives your browser a resume credential tied to that backend session. Two settings control it:
- Whether WebTerm uses it: Settings → Connection → "Automatically Resume Session After Disconnect" (off by default).
- How long a dropped session stays resumable: a server-wide setting an admin controls from the Dashboard's Settings tab (default 180 seconds).
With it turned on:
- An unexpected drop (a network blip, as opposed to you clicking Disconnect or the host ending the session):
- WebTerm shows
[Connection lost -- attempting to reconnect...]and the toolbar's connect icon spins. - It retries reattaching to the same still-live host session a few times, with increasing delay.
- A successful reattach shows
[Reconnected], and you pick up exactly where you left off. - If the credential has expired or the session is really gone, it gives up right away.
- WebTerm shows
- Reloading the page, or the browser crash-restoring your tab, also reconnects you to the same session, with your colors, function keys, custom rows/columns, and other settings intact — not a blank default form. This works per-tab: closing a tab normally clears its resume state.
- Turning the setting off while a session's resume credential is still held immediately discards it, so a later unexpected drop can no longer silently reattach — you'd get a fresh login instead.
Regardless of the setting:
- Clicking Disconnect yourself always ends the backend session immediately — there's nothing left to resume even if you reconnect right after.
- If the host session ends on its own (you typed
exitor logged out), WebTerm shows a clean[Session ended]message instead of trying (and failing) to reconnect. - A tandem Watch/Control tab never auto-resumes — if it drops, it just disconnects.
![The terminal after an unexpected drop: [Reconnected], and the same host session carrying on](https://rdminfinity.com/wp-content/uploads/2026/10/webterm-session-resume-6edf79b3-1024x608.png "webterm-session-resume-6edf79b3")
The Dashboard
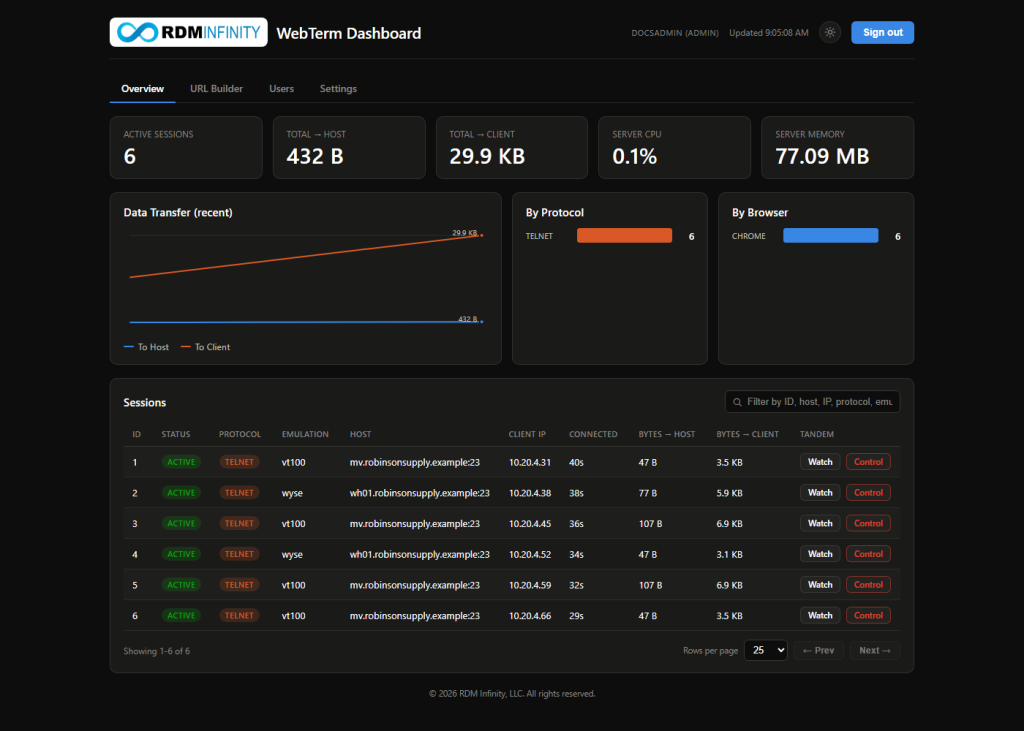
The Dashboard (dashboard.html) is a separate admin/monitoring page — reached by browsing directly to it, not linked from the terminal toolbar — for seeing every active session across all users and jumping into any of them.
Signing in
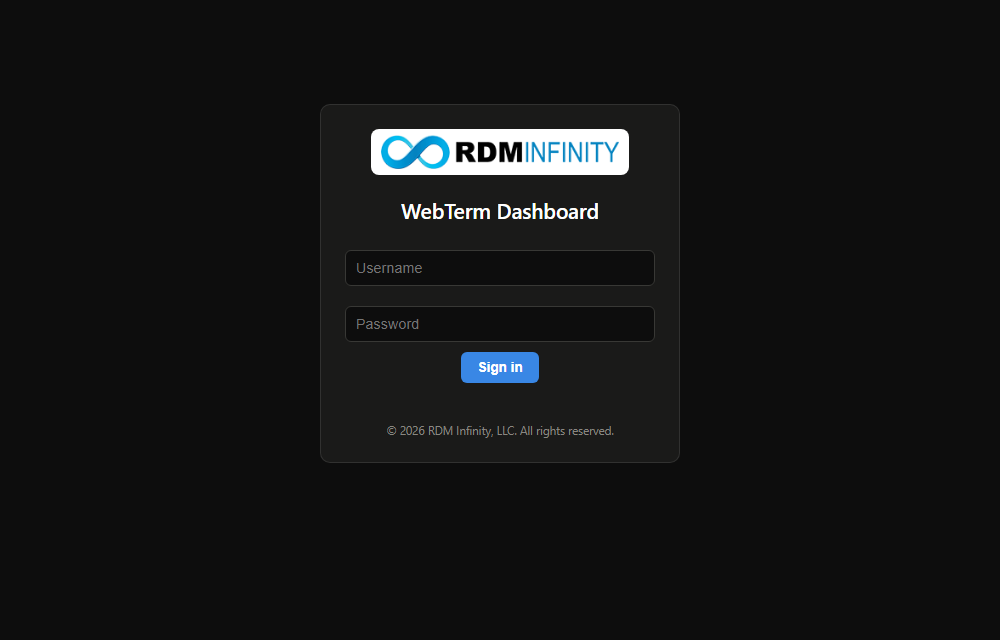
Access is by individual username and password, not a single shared secret. Enter your credentials and click Sign in (or press Enter in either field).
- Wrong credentials report "Invalid username or password."
- Lockout: five failed attempts against the same account lock it for 15 minutes, even if the next attempt would have been correct. This is a brute-force guard.
- Session: signing in starts a session tied to your browser (an httpOnly, secure cookie, so there's nothing to copy or store). It lasts up to 8 hours of activity, or until you click Sign out, which ends it immediately in the browser and on the server.
- Top bar: shows your username and role. The sun/moon icon beside it switches the dashboard between dark (default) and light mode, and remembers your choice.
Roles
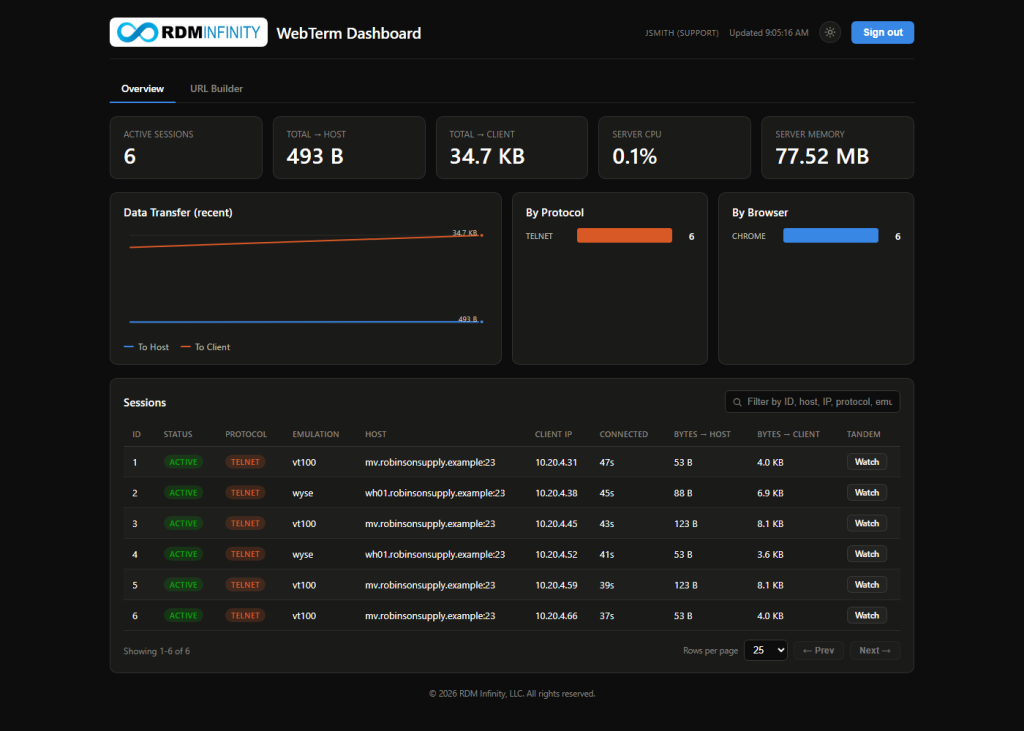
Every account is either Admin or Support:
| Overview / URL Builder / Watch | Control | Users tab | Settings tab | |
|---|---|---|---|---|
| Admin | ✅ | ✅ | ✅ | ✅ |
| Support | ✅ | — | — | — |
A Support account can do everything on the Dashboard except open a Control tandem link, manage accounts, or reach the Settings tab — all three are hidden from the Support UI entirely (there's no grayed-out button to notice), and all three are also rejected on the server if attempted directly, so hiding the button isn't the only thing standing in the way.
Overview tab
- Stat tiles: Active Sessions (with a small trend sparkline), and cumulative bytes transferred To Host / To Client across every session.
- Data Transfer chart: a two-line chart of recent to-host/to-client traffic (roughly the last 5 minutes); hovering shows exact byte values for a moment in time. This history lives only in your open Dashboard tab and resets if you reload — nothing is stored server-side.
- By Protocol / By Browser: breakdowns of currently-active sessions.
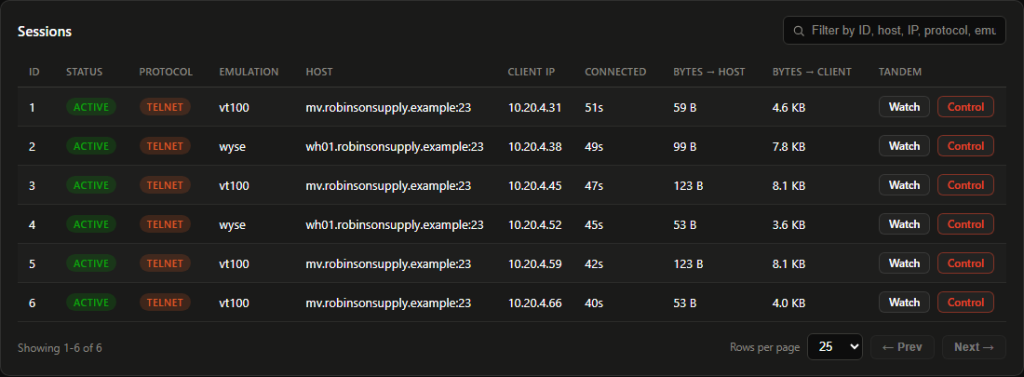
- Sessions table: one row per active (or recently dropped but not yet cleaned up) session.
- Columns: ID, status, protocol, emulation, host, client IP, connected duration, bytes each direction, and tandem viewer count.
- Each row has a Watch link, plus a Control link for Admin accounts (see Section 7).
- A filter box narrows the table live by id, host, IP, protocol, emulation or status.
- Pagination (25/50/100/250 rows per page) keeps a busy fleet manageable.
The table refreshes automatically every 5 seconds while you're signed in.
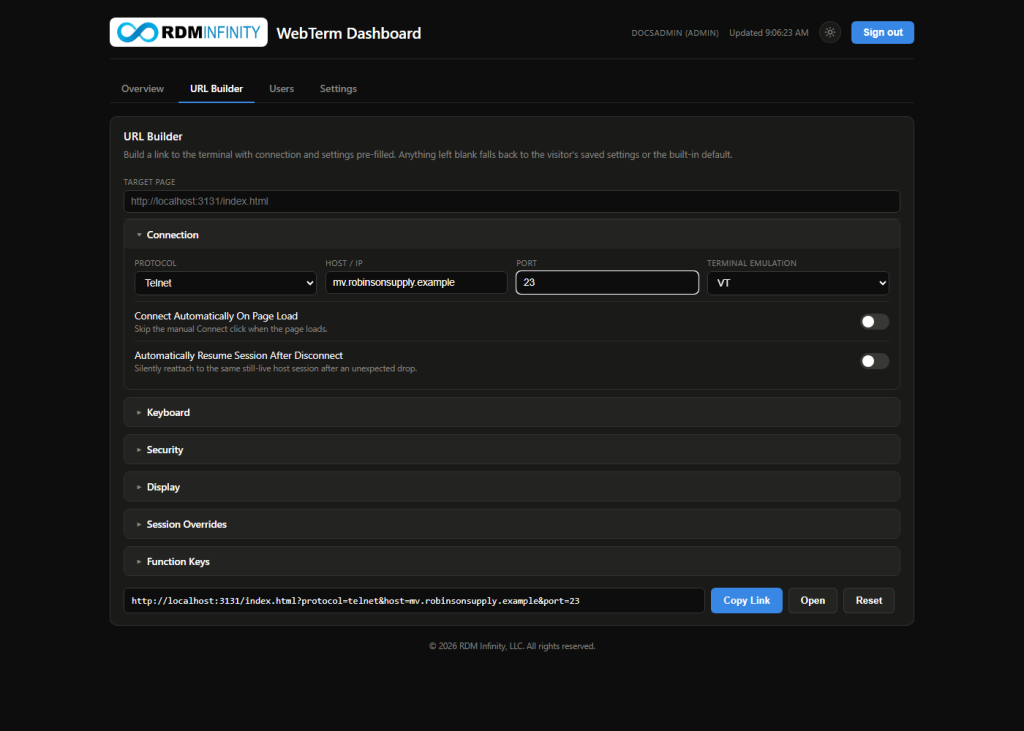
URL Builder tab
A form with every connection, keyboard, security, display, session-override and function-key field from the terminal page. It lets an admin hand someone a single pre-filled link instead of walking them through manual setup. That's useful for a kiosk-style workstation, a support link, or putting a group of users on the same host and settings.
- The URL updates live as you fill in fields.
- Copy Link puts it on the clipboard, Open launches it in a new tab, and Reset restores every field to its default.
- A field is only added to the link when it differs from its default, so a mostly-default link stays short.
- Available to both Admin and Support accounts.
Users tab (Admin only)
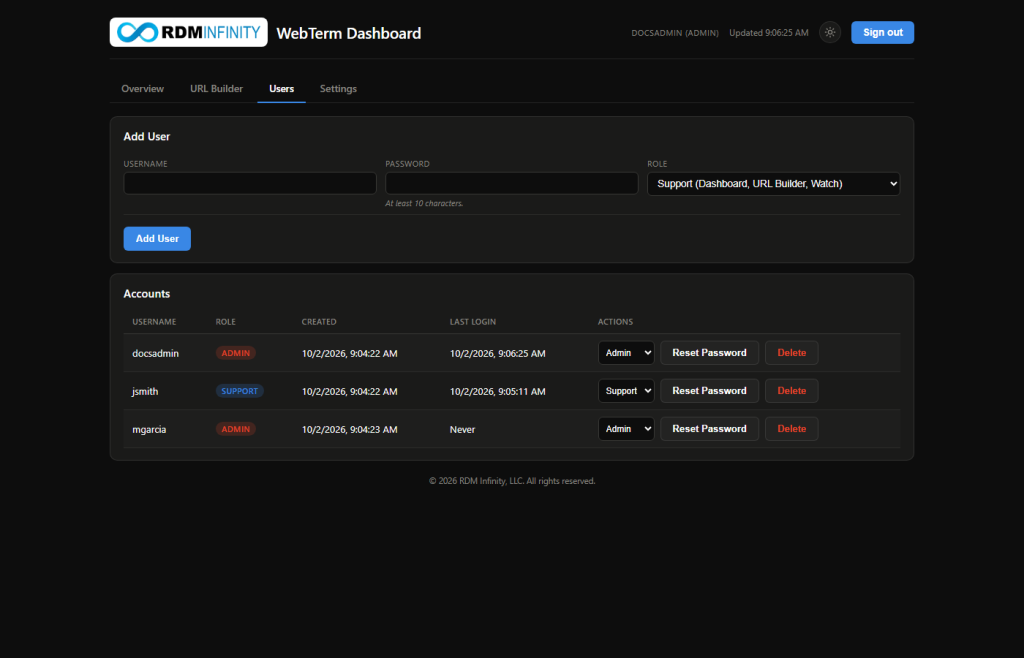
Only visible to Admin accounts — manages who can sign in to the Dashboard at all, without touching any file on the server by hand.
- Add User — username, a password (minimum 10 characters), and a role (Support or Admin).
- Accounts table — one row per account: username, role, when it was created, and its last successful sign-in (or "Never"). Each row has:
- A role dropdown — moves an account between Support and Admin immediately.
- Reset Password — sets a new password for that account right away. The account isn't notified automatically — pass the new password along yourself.
- Delete — permanently removes the account, after a confirmation prompt.
- The last remaining Admin account can't be demoted or deleted by anyone, itself included, so the Dashboard can never end up with no admin able to manage accounts. You also can't delete the account you're currently signed in as — sign in as a different admin to remove it.
Settings tab (Admin only)
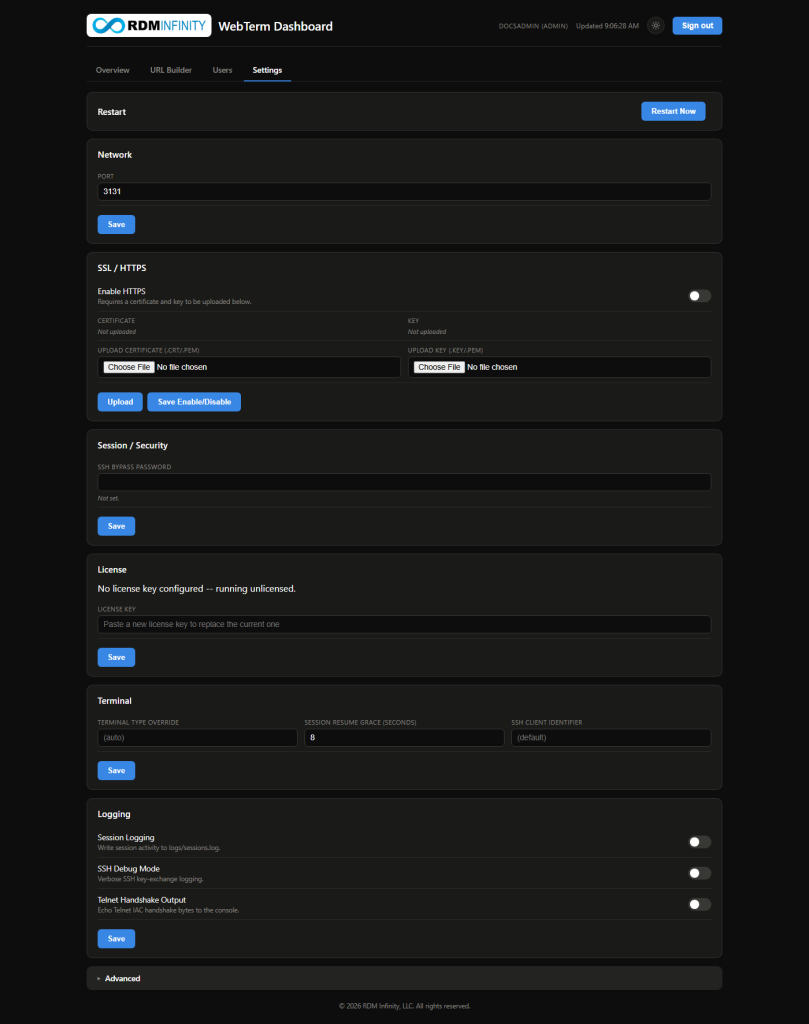
Only visible to Admin accounts — edits config.json on the server directly, instead of you having to find and hand-edit the file yourself.
Nothing saved here takes effect until WebTerm restarts: config.json is only read once, at server startup, so a save just writes the file. As soon as any saved value differs from what's actually running, a banner reading "Restart required — changes saved to config.json won't take effect until the server restarts." appears above the other cards and stays until you restart:
The Restart Now button on that banner restarts WebTerm in place — expect it back within about 15–30 seconds.
Network
| Setting | Default | Description |
|---|---|---|
| Port | 3000 |
The TCP port WebTerm listens on. |
SSL / HTTPS
| Setting | Default | Description |
|---|---|---|
| Enable HTTPS | Off | Serves the app over HTTPS instead of plain HTTP. WebTerm refuses to save this turned on until both a certificate and a key are uploaded below. |
| Upload Certificate / Upload Key | Not uploaded | Uploads a .crt/.pem certificate and/or a .key/.pem private key — each is checked for a plausible PEM header before being accepted, not just any file. Uploading (Upload) is a separate step from turning HTTPS on (Save Enable/Disable) — upload both files first, then enable. Whatever you upload is always stored as certs/server.crt and certs/server.key; an existing file is backed up alongside itself (.bak) before being overwritten. |
Session / Security
| Setting | Default | Description |
|---|---|---|
| SSH Bypass Password | Not set | The password WebTerm sends for Settings → Connection → Security → "Send SSH Bypass for Local Login" on the terminal page (see Section 3). Write-only: the field always shows blank, and a hint above it just confirms whether one is currently set. Leave it blank when saving to keep the current password unchanged; type a new one to replace it. |
License
| Setting | Default | Description |
|---|---|---|
| License Key | Not configured | Same write-only pattern as the bypass password — the field is always blank, and a status line above it reports whether a key is configured and valid rather than showing the key itself. Paste a key here to add one for the first time or replace the one already set. |
Terminal
| Setting | Default | Description |
|---|---|---|
| Terminal Type Override | Blank (auto) | Forces every connecting session to a specific terminal type on the server side, overriding whatever the user picked from the toolbar's Terminal Type dropdown (see Section 9). Leave blank to let each user's own choice stand. |
| Session Resume Grace (seconds) | 180 |
How long a dropped session stays eligible for Session Resume before the server gives up on it for good. |
| SSH Client Identifier | Blank (default) | Replaces the software name WebTerm reports to SSH hosts during the connection handshake (sent as SSH-2.0-<value>). Leave blank for the default. Some SSH servers only start a session for OpenSSH clients: they accept the login but never show a prompt, so the terminal sits blank after "Connection successful". For those hosts set this to OpenSSH_for_Windows_9.5. Applies to every SSH session on this server. Letters, digits and punctuation only, with no spaces or -. |
Logging
| Setting | Default | Description |
|---|---|---|
| Session Logging | Off | Writes session activity to logs/sessions.log. |
| SSH Debug Mode | Off | Verbose SSH key-exchange logging — turn on when troubleshooting a connection that won't negotiate. |
| Telnet Handshake Output | On | Echoes Telnet IAC handshake bytes to the server console. Turn off to quiet a busy console/log on a server handling a lot of Telnet traffic. |
One config.json setting has no control here on purpose: sessionSecret, which signs Dashboard/Tandem session cookies, is generated automatically the first time WebTerm is installed and is never shown or accepted anywhere in this API — edit it directly in config.json only if you specifically need to (for example, to invalidate every existing Dashboard session at once), and restart afterward.

Creating the first account
Accounts live in a per-account store rather than a single shared secret, so the very first Admin account has to be created from the server's own command line — there's no one signed in yet to use the Users tab. From the server directory on the machine running WebTerm:
node tools/create-user.js <username> <password> adminEvery account after that first one can be created from the Users tab by any existing Admin.
Tandem Viewing and Control
Tandem lets a second browser tab attach to a session that's already running in someone else's tab — for support, training, or supervision — without that person having to share their screen.
- It's started from the Dashboard's session table, not from the terminal page.
- You must be signed in to the Dashboard. The tab that opens authorizes off that login, so the link is no use to someone who isn't signed in themselves.
There are two kinds of tandem tab:
- Watch — a read-only view of the live session. Available to both Admin and Support accounts.
- It shows everything the session outputs, rendered with that session's own terminal emulation.
- Nothing typed in the watching tab is ever sent to the host.
- The toolbar shows a "👁 TANDEM VIEW — READ ONLY" badge, and the connection fields are disabled because you're attaching, not connecting.
- Control — the same attachment, but two-way. Admin accounts only.
- Keystrokes typed in this tab are sent to the live host, mixed in with whoever else is typing. There is no locking or turn-taking.
- Control always asks for confirmation before opening, so a stray click can't inject keystrokes into someone else's session.
- Its badge reads "⌨ TANDEM CONTROL — LIVE INPUT".
- A Support account doesn't see the Control link, and the server rejects a Control attempt from a Support session even if the link is opened directly.
Any number of Watch tabs can be open on the same session at once; each is independent and closing one doesn't affect the original session or any other viewer.
RDM Host Tools Helper
A small optional desktop helper app that lets a host-driven action do a couple of things a browser sandbox can't do on its own: open a local file/URL directly on your machine, or send a print job to a local printer, both triggered from the host side rather than anything you click in the browser.
When one of those actions fires:
- Helper app installed: WebTerm hands off to it through a custom URL scheme. You shouldn't notice anything beyond the file opening or the print job appearing.
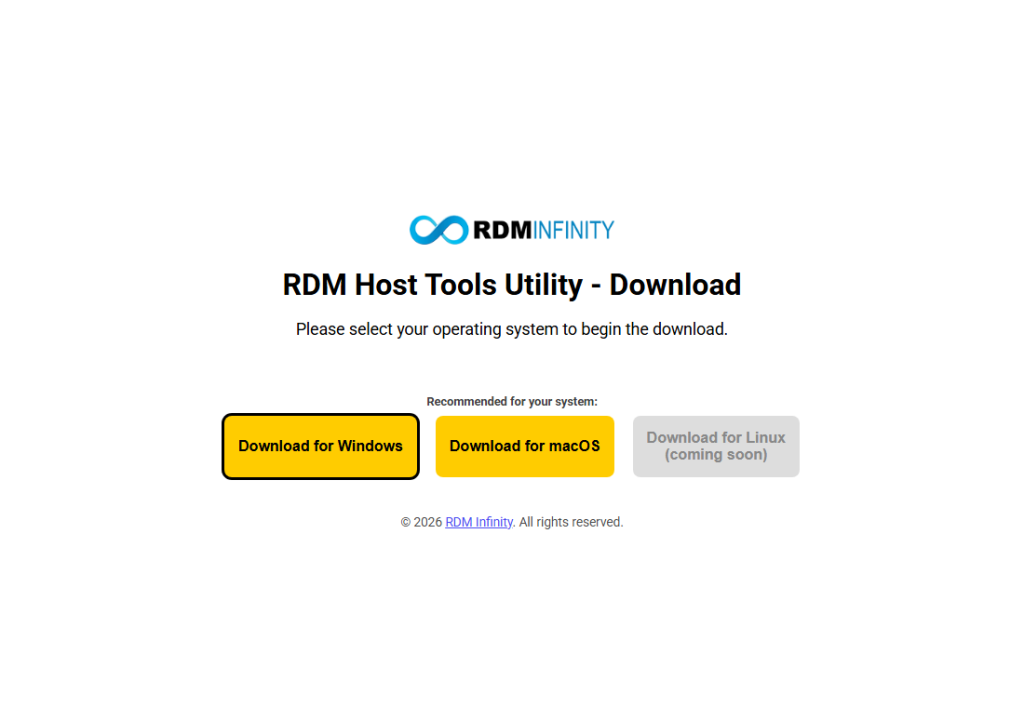
- Helper app not installed: WebTerm detects that (nothing on your system claims the handoff within about 2 seconds) and opens a small download page. It has Download for Windows and Download for macOS buttons, with the one for your system highlighted; a Linux build is listed as coming soon. Install it once and the handoff works silently from then on.
Terminal Emulation and Host Integration Features
This section covers what each Terminal Type actually does, plus a set of features an MV host program can trigger on the browser side — drawing images, popping an alert, opening a local file, printing locally, and querying the terminal — all driven by escape sequences the host writes, not by anything the user clicks.
Terminal type profiles
The Terminal Type dropdown (VT / WYSE / ADDS) controls how WebTerm translates the host's raw control codes:
- VT — treated as VT100/xterm-compatible; almost no translation needed. The default/fallback choice.
- WYSE — for hosts emitting classic Wyse-50/60 ("WY60") escape sequences, the terminal type most MultiValue systems expect.
- ADDS — for hosts emitting ADDS Viewpoint-style escape sequences.
Pick the one that matches what your host is configured to talk to. The wrong choice visibly corrupts cursor positioning and text attributes, because WYSE and ADDS use overlapping escape sequences for different things.
Two related settings:
- Custom ViewType (Settings → Connection → Session Overrides) only changes the terminal-type string presented to the host or login process. It doesn't change which of the VT/WYSE/ADDS translations WebTerm applies, so set both to match if your host cares about the reported type.
- Terminal Type Override (Dashboard Settings → Terminal) lets an admin force this dropdown's value for every session server-wide. It takes precedence over whatever an individual user picks.
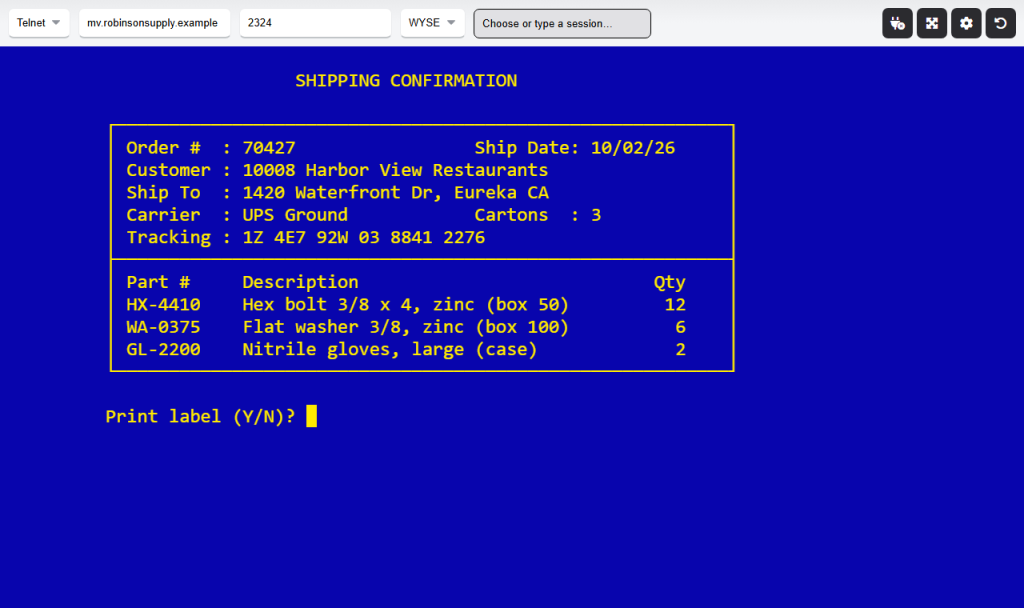
Graphics mode remaps a set of plain characters into box-drawing line characters, so a host program can draw forms, boxes and borders using ordinary characters.
- The host turns it on and off with escape sequences; it isn't something you toggle.
- Under WYSE, the full WY-50 line set is supported: corners, horizontal and vertical lines, the four T-junctions (
049=), the cross (8) and the checkerboard (;). - It's turned off automatically on disconnect and on Reset Terminal.
Host-drawn images
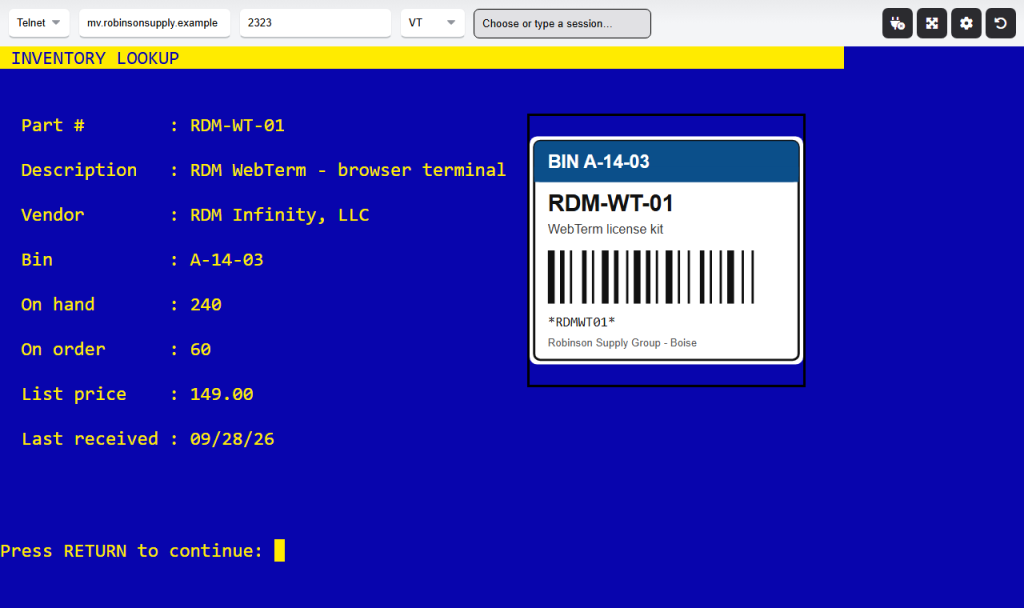
A host program can overlay images directly on the terminal screen at a specific character-cell position:
- Show:
ESC STX "iL,":path:",":x:",":y:",":width:",":height:",":aspect:",":border:CRpath— image URL/path; also serves as that image's identity for later removal.x,y— position in terminal character cells (column, row) from the top-left corner.width,height— a plain number is sized in character cells; a value ending inpxis treated as literal pixels.aspect—1forces a square image (height matches the computed width); anything else usesheightas given.border— anything other thanNdraws a visible border around the image.
- Remove one image:
ESC STX "iD,":path:CR— removes the image previously shown with that samepath. - Clear all images:
ESC STX "iC":CR
Images are also removed automatically on a full clear-screen, on Reset Terminal, and on disconnect, so a host program only needs an explicit remove/clear when it wants to take an image down mid-session without also clearing the screen.
Host popup alerts
A host program can pop a blocking browser alert: ESC STX "P" ... "&" message \x19 ... CR (the message text is delimited by a leading & and a trailing EM character, \x19). WebTerm shows it as a native browser alert box; once the user dismisses it, WebTerm sends FF CR LF back to the host as an acknowledgment so the host program knows it's safe to continue.
Opening a local file/URL, and local printing
Two related features hand off from the host to the optional RDM Host Tools helper app on the user's machine:
- Open a URL or local file:
ESC STX "<" url CRopens a normal URL in a new browser tab, or — for afile://path specifically — hands it to the Host Tools helper app instead (since browsers block navigating directly to local files from a web page). A second form,ESC STX ">" payload CR, always hands off to the helper app and sendsFF CR LFback to the host afterward as an acknowledgment. - Print to a local printer (AUX/slave print): requires the Host Tools helper app.
- Wrap a block of output between the same "start slave print" / "stop slave print" escape sequences a real WYSE or ADDS terminal uses for a physically attached slave printer.
- WebTerm captures whatever is written between those markers and, once the block ends, hands it to the helper app to send to the user's default local printer.
- No separate print protocol is needed beyond those control codes.
If the Host Tools helper app isn't installed for either of these, the user is taken to its download page instead (see Section 8).
Identifying the client and querying window size
- A host program can ask "what terminal client is this?" by sending
ESC STX "I" CR; WebTerm replies with an identity/version string (e.g.RDM Web Term 1.5.3;1.5.3;;;;;;+ CR), letting a host program detect it's talking to WebTerm specifically (rather than a physical terminal) and branch on version if needed. This mirrors AccuTerm's ownESC STX Irelease-info query, but WebTerm identifies itself by name rather than claiming to be AccuTerm. - A host program can query WebTerm's supported features with the AccuTerm-style host capabilities query,
ESC STX "?" CR. WebTerm replies withplatform*product*license*capabilities*services+ CR, for example0*0*1*DEGIMPSUV*g+ CR:- platform and product are
0, because WebTerm has no AccuTerm-registered platform or product number. - license is
1(single user). - capabilities is the subset of AccuTerm's letter codes WebTerm implements today:
DWTD download,Eexecute/open a local file or URL via Host Tools,GGUI (images/popups/alerts),Iimage display,Mquery status (thePInitSession.Outputquery below),Ppacketized ESC-STX feature-frame messages,Sscripting (HScript),UWTD upload, andVthis capabilities command itself. - services is
g(GUI automation) only. WebTerm has no Object Bridge (a) or file converter (b) service.
- platform and product are
- A host program can query the terminal's current column/row size at any point in a session (not just at login) by sending
ESC STX "PInitSession.Output" CR; WebTerm replies with"<cols>,<rows>" CRreflecting whatever size is actually in effect, including any custom rows/columns override or a mid-session 82/132-column switch.
132-column mode
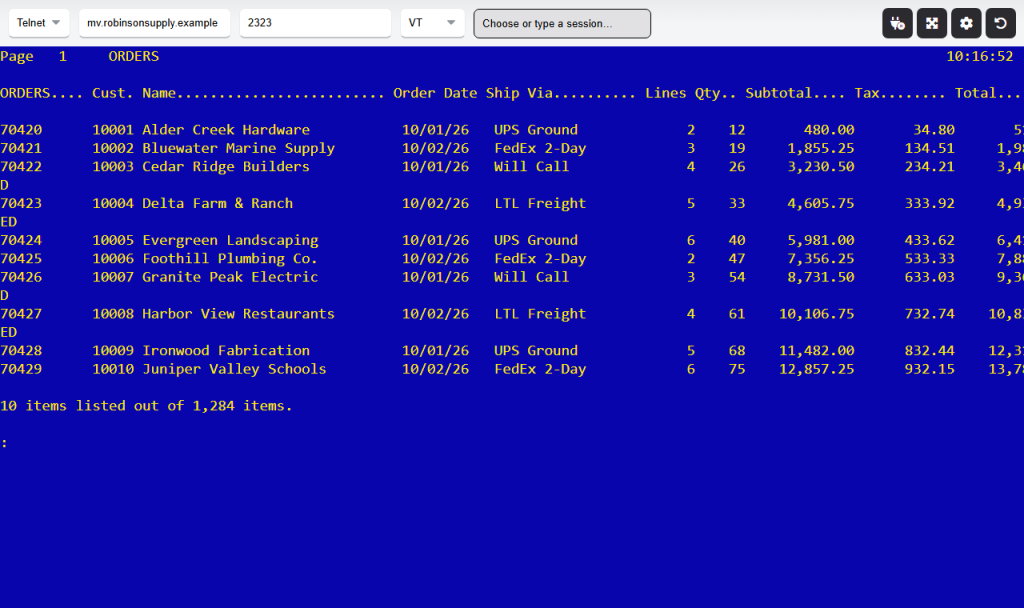
The host can switch a session between the normal 82×24 size and a wider 132-column mode using the appropriate escape sequence for the active emulation; WebTerm resizes and re-fits the font automatically when it happens. Independent of that, the toolbar's Toggle Terminal Size button lets a user flip between 82 and 134 columns manually at any time.
The bell
When Settings → Keyboard → "Play Bell Sound" is on, any BEL character from the host plays a short audible tone.
Function keys — built-in defaults
A function key whose field in Settings is blank still sends a built-in default for the active terminal type. For example, VT100's F1–F12 send the standard xterm sequences. Filling in a field only matters when you want to override that default.
- Turning the fallback off: Settings → Function Keys → "Send Terminal Default When Blank" controls it. Turn it off to send nothing at all for keys you haven't assigned.
- Home is always suppressed and never sends anything to the host, in any emulation.
- Ctrl+Space sends Ctrl-W to the host, so you don't have to fight the browser's own "close tab" shortcut to send that control character.
- Closing or reloading the tab while connected shows a confirmation prompt and sends Ctrl-W to the host first, in case that's what you meant to do.
WCE — Web Code Editor
What it does
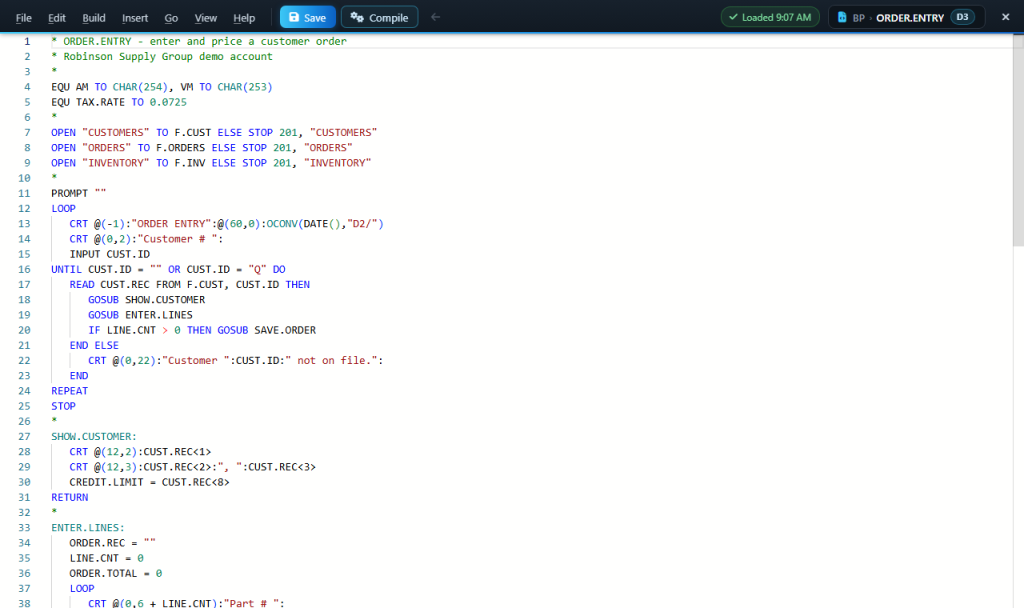
WCE lets you open, edit, and compile MultiValue BASIC (or proc) source directly from your browser, using a full code editor (with MV BASIC syntax highlighting) in place of a line editor at TCL. It's driven entirely from the host side — you invoke it as an MV program, and it opens the item in a new browser tab.
Using it
From TCL, on an account where the host programs are installed (see Installing the Host Programs):
WCE <file-name> <item-name>WCE DICT <file-name> <item-name>WCE <file-name> <item-name> <item-name2> <item-name3> ...<file-name> <item-name>— opens that item from that file in a new editor tab. If the item doesn't exist yet, WCE offers to create a blank one first.DICT— opens a dictionary item instead of a data item (same file/item arguments, applied against the file's dictionary).- Multiple items — list up to 10 additional item names after the first to open each one in its own tab in a single
WCEinvocation. The same file name applies to every item in the list. - WCE locks every item before it opens any tabs. If one of them is locked by another user, or you decline to create a missing one, WCE releases the items it already locked and stops, so you never get a partial set of tabs.
- Each item stays locked while its tab is open, including across saves, and is released when that tab closes.
- Items larger than the configured size limit (2,000,000 characters by default, see WCE.CONTROL) are refused.
The editor tab
Each item opens in its own browser tab (editor.html). Across the top is a menu bar — File, Edit, Build, Insert, Go, View, Help — followed by three shortcut icons (Save, Compile, Back). On the right are an orange ● when there are unsaved changes, the item's file and name, the host platform (D3, jBASE or MVsharp; WCE 1.x instead when the host runs an older WCE), the latest status (for example "Saved 2:41 PM"), and ✕ to close.
Open a menu by clicking it, or press Alt plus the underlined letter (Alt+F for File). Once a menu is open, the arrow keys move around it and across to the other menus, Enter runs the highlighted item, and Esc closes it. Greyed-out items say why when you hover over them. Help → Keyboard Shortcuts lists every shortcut, and F1 opens a searchable list of every command.
| Menu | What's in it |
|---|---|
| File | Save (Ctrl+S), Revert to Last Save, Compare with Last Save, Compare with Pasted Source…, Download a Copy, Close (Ctrl+Shift+X) |
| Edit | Undo, Redo, Find (Ctrl+F), Replace (Ctrl+H), Toggle Comment (Ctrl+/), Format Document (Shift+Alt+F), Format Selection (Ctrl+K Ctrl+F) |
| Build | Compile (Ctrl+F12), Catalog, Compile + Catalog (Ctrl+Shift+F12) |
| Insert | Value Mark (Ctrl+]), Sub-Value Mark (Ctrl+\) |
| Go | Back (Alt+←), Go to Line (Ctrl+G), Go to Label (Ctrl+Shift+O), Find Jumps to Label (Shift+F12), Open Program (F12), Peek (Alt+F12), Next/Previous Problem (F8 / Shift+F8) |
| View | Language, Theme, Font Size, Indent Size, Word Wrap (Alt+Z), Minimap, Show Whitespace, Highlight VM/SVM Marks, Code Checks |
| Help | Keyboard Shortcuts (Ctrl+K Ctrl+S), Command Palette (F1), About WCE (WebTerm version, the host platform, links to rdminfinity.com and the third-party licenses) |
- Save sends your edited content back to the host, which writes it to the item exactly as shown, including leading blank lines and indentation. The ● goes away once the host confirms the save.
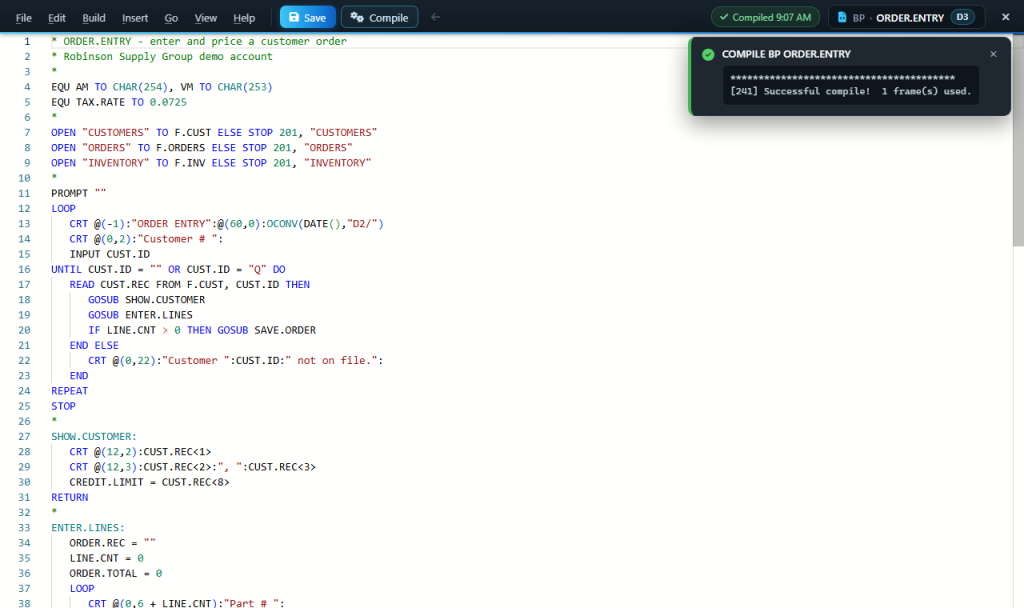
- Compile compiles the item with the configured compile verb. The result appears in a notification in the editor tab: the command that ran, with the compiler's output underneath one line per line. It's marked green with a ✓ when the output reports success (for example D3's
[241] Successful compile!) and red when it reports errors, and the status in the menu bar says Compiled or Compile errors to match. The notification stays for 30 seconds; the × closes it sooner. - Catalog catalogs the item with the configured catalog verb.
- Compile + Catalog compiles, then catalogs, and shows both outputs together. The catalog step runs even if the compile reported errors, so check the compile output.
- Close closes the tab and releases its item's lock. Once every editor tab tied to a terminal session is closed, the host-side
WCEprogram returns to TCL.
Save, Compile and Catalog always act on the file the tab's item came from, so tabs opened from different files each compile and catalog into their own file.
Catalog, Compile + Catalog and opening called programs need WCE 2.0 or later on the host; with an older WCE they're greyed out, and the menu bar shows a grey WCE 1.x tag in place of the platform (hover it for details). Save and Compile work with any WCE version. To update, re-run the install from Settings → About (see Section 12).
You can have several editor tabs open at once (from one or more WCE invocations); each is tracked independently.
Navigating and autocomplete
- Jump to a label — double-click the label name after
GOSUB,GOTO,GO TOorRETURN TO, including any name in anON x GOSUB A, B, Clist, and the editor jumps to where that label is defined.- Both alphanumeric labels (
PROCESS.LOOP:) and numeric statement labels (100) work. - A label can even be a BASIC keyword, such as
LOOP:, when nothing but a comment follows the colon on that line. (PRINT:,CRT:andDISPLAY:are still statements.) - F12 does the same from the keyboard, and Alt+← or the Back button returns you to where you jumped from.
- Both alphanumeric labels (
- List all labels — Ctrl+Shift+O lists every label in the program; type to filter, then Enter to jump.
- Find every GOSUB to a label — put the cursor on a label (the definition or any jump to it) and press Shift+F12.
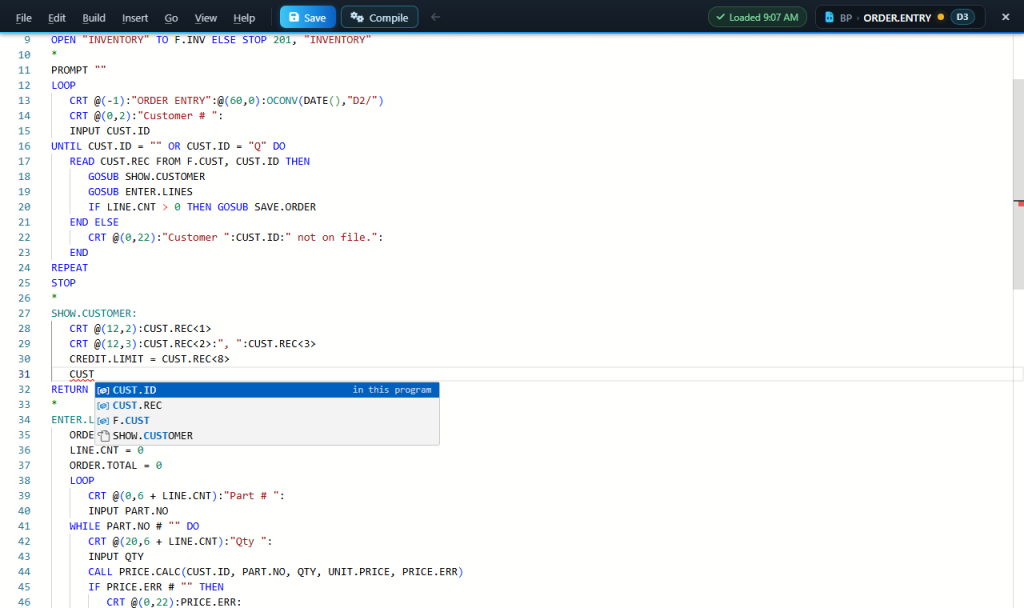
- Autocomplete — suggestions include the variables, file variables, EQUATEs, labels and other names already written in this program, updated as you type, as well as keywords, functions and snippets. Matching is fuzzy, so
RECfindsCUST.REC. Right afterGOSUB/GOTOonly labels are suggested. - Dotted names such as
CUST.RECare treated as one word by double-click, Ctrl+←/→ and autocomplete. - The editor uses the syntax dialect for the host's platform (D3, jBASE or MVsharp). It's detected automatically with WCE 2.0 or later on the host.
MVsharp embedded C#
MVsharp programs can contain C# in tagged sections: [CSHARP] … [/CSHARP] in the program's code, and [REFERENCES], [USING] and [CLASSES] sections for what that C# needs. The editor colours the contents of these sections as C#, while the code around them keeps its BASIC colouring. The opening tag must start its line; the closing tag can come anywhere after it, including later on the same line ([USING] System.Text; [/USING]). Tags aren't case-sensitive.
Inside these sections the BASIC features stay out of the way:
- Code checks don't read the C# as BASIC, and autocomplete doesn't offer BASIC suggestions.
- Label jumps and Go to Definition don't apply.
- Names used in the C# don't show up in autocomplete for the BASIC code.
A section's own problems are underlined as warnings:
- an opening tag with no closing tag (the section then runs to the end of the program)
- a section closed by a different tag (
[CSHARP] … [/USING]) - a closing tag with no section open
![An MVsharp program whose [CSHARP] and [USING] sections are coloured as C#](https://rdminfinity.com/wp-content/uploads/2026/10/webterm-wce-mvsharp-83cf0739-1024x608.png "webterm-wce-mvsharp-83cf0739")
Code checks
While you type, the editor underlines problems it can spot without compiling:
- Red (error):
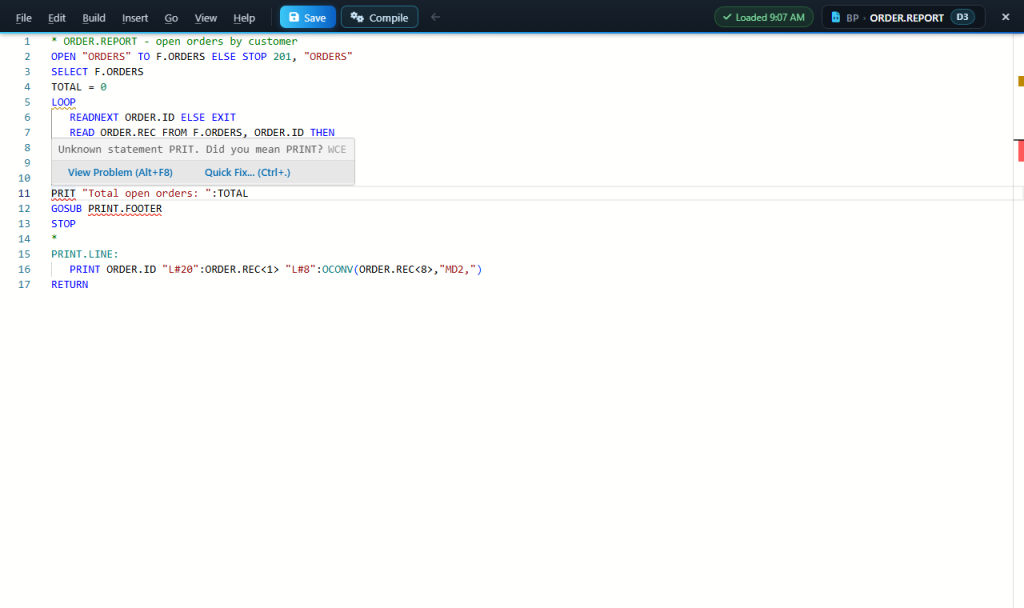
- a statement that starts with a word that isn't a BASIC statement and isn't an assignment, for example a typo like
PRIT "HELLO"orI X = 1 THEN("Unknown statement PRIT. Did you mean PRINT?"). Statements afterTHEN/ELSEon the same line are checked too. Assignments of every form (X = 1,REC<1,2> = "A",ARR(3) += 1,MSG := "B") are fine. - a
GOSUB/GOTO(orON x GOSUBlist entry) to a label that isn't defined in this program, with a "Did you mean …?" suggestion when there's a close match. - a label defined twice.
- a statement that starts with a word that isn't a BASIC statement and isn't an assignment, for example a typo like
- Yellow (warning): block structure that doesn't match up — for example a
LOOPwith noREPEAT, aFORwith noNEXT, anIF … THENorREAD … ELSEblock with noEND, or anEND CASEwith noBEGIN CASE. A plainENDat the end of the program is fine, and so is aREPEATat the end of a line, as inUNTIL X > 5 DO REPEAT.
Hover over an underline to read the message, and press F8 / Shift+F8 to step through them. When a message suggests a fix ("Did you mean PRINT?"), put the cursor on the underlined word and press Ctrl+. (or click the lightbulb), then Enter, to apply it. The warnings come from reading the program's structure rather than compiling it, so the compiler's own output is still the final word. Turn the checks off with View → Code Checks.
Formatting
Edit → Format Document (Shift+Alt+F) re-indents the whole program by its block structure: the contents of IF … THEN / ELSE … END, LOOP … REPEAT, FOR … NEXT, BEGIN CASE / CASE … END CASE, and READ / OPEN / LOCATE … THEN / ELSE / LOCKED … END blocks move in one level, and WHILE … DO / UNTIL … DO line up with their LOOP. Format Selection does the same for just the selected lines.
Code under a NAME: label — a GOSUB routine — is indented one level from its label, and the RETURN that ends the routine lines up with the label again. (A RETURN inside an IF … END or other block stays indented with that block.) Numeric statement labels (100) don't start an indented region, since they're usually GOTO targets inside the main code.
An MVsharp embedded C# section (see above) doesn't change the BASIC indentation around it. Its opening tag is indented like a statement at that point. The C# inside moves by the same amount, so its own layout is kept, and a closing tag on its own line lines up with the opening tag.
Formatting only ever changes the spaces at the start of lines, so it can't change what the program does. Label lines and comments that start in column 1 are left exactly where they are, blank lines are emptied, and tabs at the start of a line become spaces. The indent size (3 spaces unless you change it) is set under View → Indent Size. Ctrl+Z undoes a format in one step.
Unsaved changes and drafts
- The orange ● in the menu bar, and in the browser tab's title, means there are changes the host hasn't confirmed saving yet. Undoing back to the saved text clears it too.
- File → Revert to Last Save throws away your changes and goes back to the last copy the host saved (it asks first).
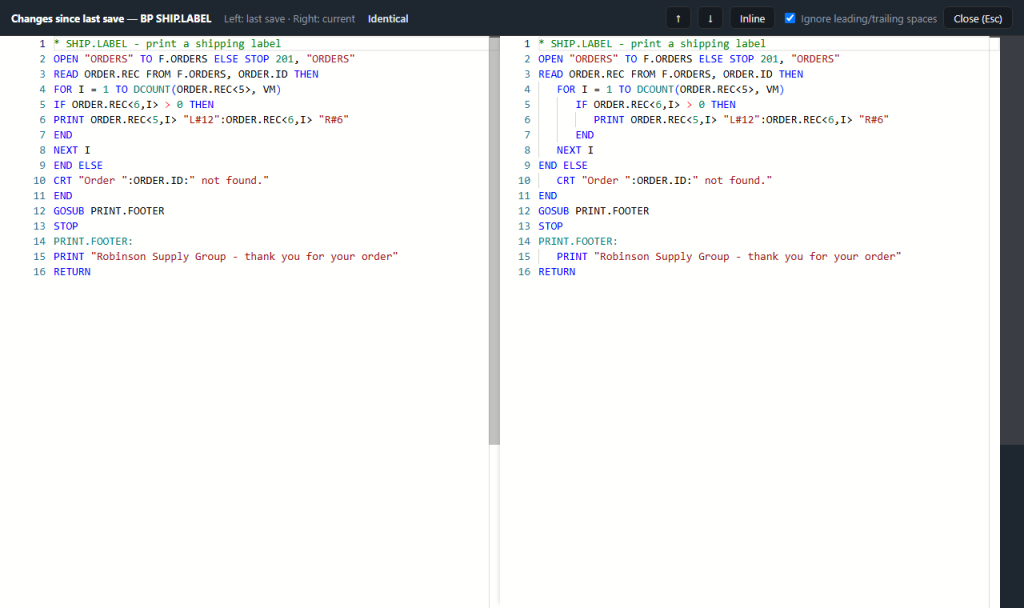
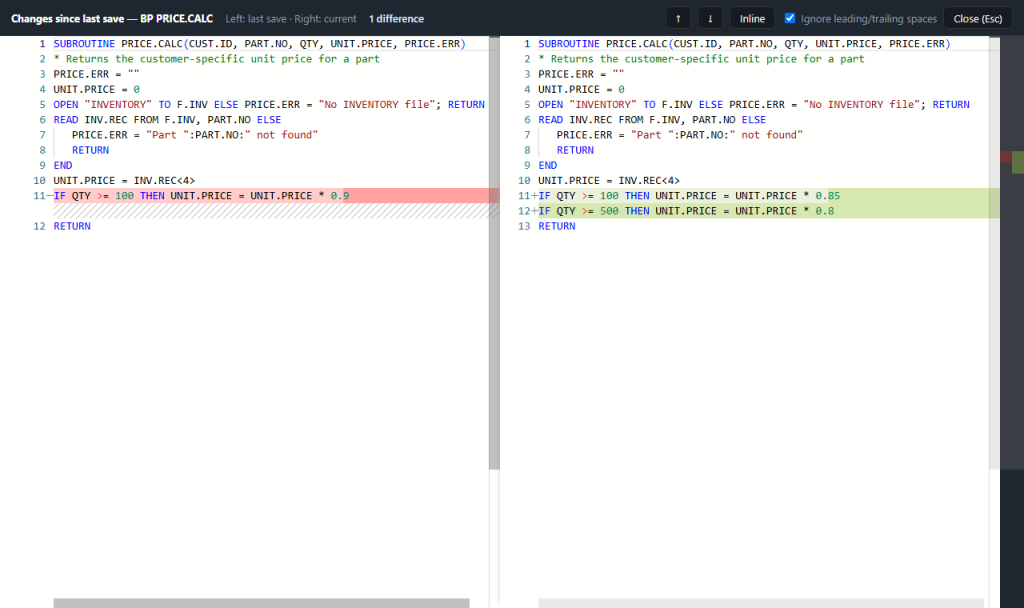
- File → Compare with Last Save shows the last saved copy and your current text side by side, with the differences highlighted. Esc closes it.
- File → Compare with Pasted Source… compares the item as it is in the editor now (unsaved edits included) with source you paste in, for example a copy from another account or an older version.
- Paste into the empty left pane. The right pane is the item and can't be changed from here.
- The count at the top shows how many blocks differ (Identical if none), and ↑ / ↓ step through them.
- Inline switches to a single-column view. Ignore leading/trailing spaces (on by default) can be turned off to see indentation changes.
- The pasted text is never sent to the host and nothing in this window saves. It is kept until the editor tab closes or reloads, so reopening the compare shows it again.
- File → Download a Copy saves the current text to a
.txtfile on your computer. - Drafts: while you have unsaved changes, the editor keeps a copy of them in this browser.
- If the tab closes, the browser crashes, or the terminal session drops before you save, the next time you open that item in WCE a yellow bar offers to Restore those changes (as unsaved edits you can then save) or Discard them.
- Drafts are cleared once the host confirms a save or you close the tab on purpose.
- Items over 1 MB aren't kept as drafts, and drafts stay in the browser they were made in.
View settings
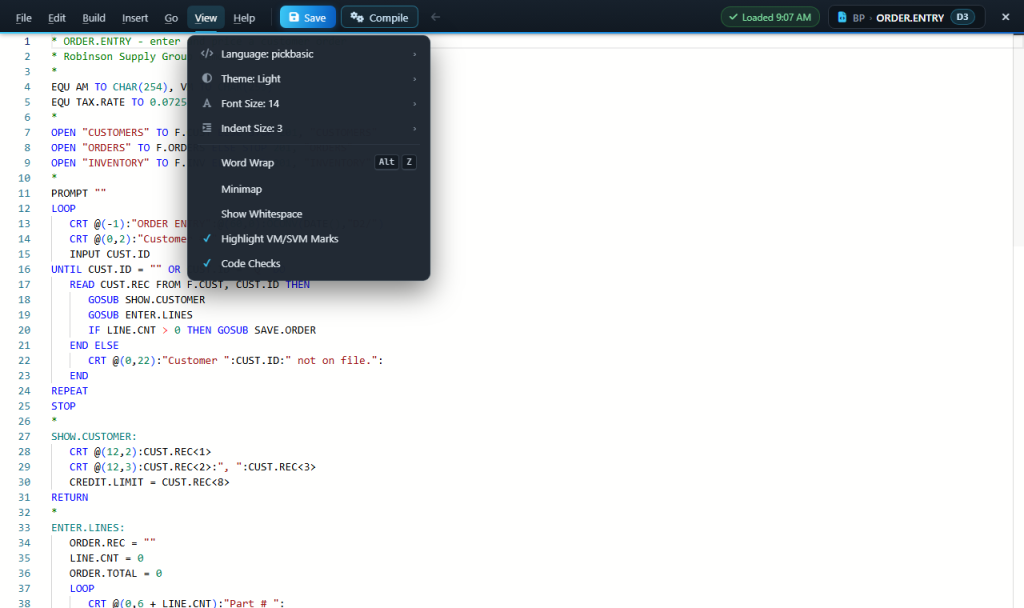
The View menu's settings — language, theme, font size (also Ctrl+= / Ctrl+- / Ctrl+0), indent size, word wrap, minimap, visible whitespace, highlighting of value/sub-value marks (ý and ü get a coloured box, with a tooltip saying which they are) and code checks — are remembered in this browser for every editor tab.
Opening and peeking at called programs
With WCE 2.0 or later on the host, you can get to the source of another program straight from the one you're editing:
-
Open it in a new tab — double-click one of these:
- the program name in
CALL NAMEorENTER NAME - the first word inside an
EXECUTE,PERFORMorCHAINstring (EXECUTE "MY.REPORT ...") - either word of a
$INCLUDE/INCLUDE/$INSERT
Double-click asks "Do you want to open <name>?" first, so a stray double-click doesn't open anything. Press Enter or click Open to go ahead, or Esc/Cancel. F12 or right-click → Open Program in New Tab opens it straight away.
It opens locked, in its own tab. That tab saves, compiles and catalogs against the program's own file, even when that file is in another account.
- the program name in
-
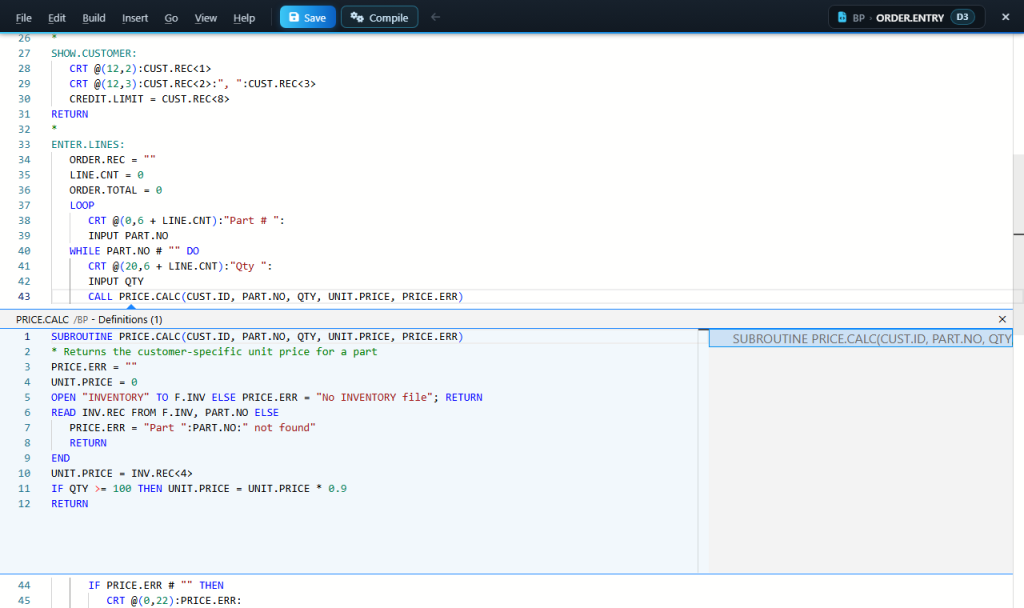
Peek at it — Alt+F12 or right-click → Peek Program / Label shows the program inline, in a window under the current line, without opening a tab or locking it. Press Esc to close it. Anything typed in the peek window isn't saved; use Open for that. Alt+F12 on a GOSUB/GOTO label peeks at the label instead.
WCE finds the program's source the way your platform records it:
| Platform | Where WCE looks |
|---|---|
| D3 | The program's MD entry. It must be a VR entry; attribute 4 names the source file and item, e.g. dm,bp, list-users. |
| MVsharp | The program's MD entry. It must be a Program entry; attribute 4 names the source file, e.g. SOURCE-MIS,SOURCE,.Lib (file SOURCE in account SOURCE-MIS). The item is the program name. |
| jBASE | jshow -c <name>. WCE uses the first entry listed, the one that actually runs, and ignores copies marked (DUP!!). Its source file line names the file; for a main program the item is the program name. |
If that doesn't find it, WCE tries each file in the search list in WCE.CONTROL attribute 5, in order. Anything else, such as a built-in verb, a PROC or a file pointer, reports "<name> is not a cataloged program."
A few cases can't be opened: CALL @VAR picks its subroutine at run time, and an item locked by another user opens only as a peek.
WCE.CONTROL settings
WCE keeps its settings in the WCE.CONTROL item in the WTS file. WCE creates it with defaults the first time it runs, and fills in any missing attributes on later runs, but it never overwrites a value that's already there. Re-installing WCE leaves it untouched. There's no settings screen for it yet; edit the item on the host:
| Attribute | Meaning | Default |
|---|---|---|
| 1 | Compile verb | BASIC on jBASE, COMPILE on D3 and MVsharp |
| 2 | Extra text added after the file and item on the compile command | (none) |
| 3 | Catalog verb | CATALOG |
| 4 | Extra text added after the file and item on the catalog command | (none) |
| 5 | Source files to search, in order, when a called program isn't found through MD or jshow (multi-valued, one file per value) |
(none) |
| 6 | Largest item WCE will open, in characters | 2000000 |
| 7 | Settings layout version, maintained by WCE | 2 |
For a dictionary item (WCE DICT ...), the commands are run as <verb> DICT <file> <item>.
Notes and limits
- WCE is a host-driven feature — there's no "Open in WCE" button in the browser; you always start it by running the
WCEprogram from TCL. - Only plain data/dictionary items are supported (no binary content).
- One
WCEinvocation opens items from one file.
WTD — WebTerm Data (Upload/Download)
What it does
WTD moves data between your browser and the MV database:
- Download (export) a set of MV items to a CSV or Excel file on your PC.
- Upload (import) a CSV file from your PC into the MV database.
It's modeled on the Manual Upload/Download utility found in other MultiValue terminal products, with the same terminology and prompt sequence where practical, so it should feel familiar if you've used one before. The one difference is that there's no protocol choice: the browser's own connection does the job a separate transfer protocol would otherwise handle.
Starting it
From TCL, on an account where the host programs are installed (see Installing the Host Programs):
WTDRun bare, WTD walks you through everything with prompts. Any value you'd otherwise be prompted for can also be supplied directly on the command line — anything left off just gets prompted for — so the same program works equally well typed by hand or driven unattended from a PROC/paragraph:
WTD S <mv-file> <item-list|*|(listname|blank> <attr-list|*|+> <pc-file-name> [<Y/N header> [<Y/N explode> [<T/C delimiter>]]]WTD R <mv-file> <item-id> [<Y/N overwrite>]WTD R S <mv-file> <item-id> [<Y/N overwrite>]WTD R B <mv-file> <Y/N use-header> <attr-list-or-*-or-placeholder> <header-skip> <Y/N auto-id> <auto-id-prefix> <auto-id-start> <Y/N overwrite>The first answer picks the direction:
| Answer | Direction | Meaning |
|---|---|---|
S / SEND / DOWNLOAD |
Download | Export MV items to your browser as a file |
R / RECEIVE / UPLOAD |
Upload | Import a browser-picked CSV into the MV database |
H / ? |
— | Shows a short help summary |
E / EXIT |
— | Cancels |
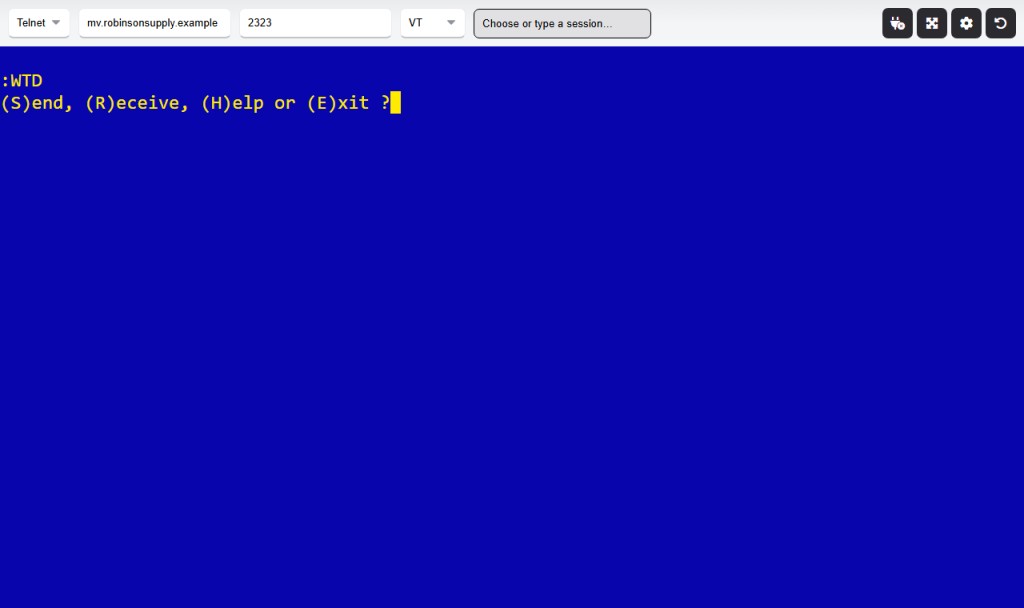
Download (Send)
Prompts, in order:
- Source file — the MV file to export from.
- Item list — one of:
- a comma-separated list of item-ids
*for every item in the file(listnameto export a specific saved list (loaded the same way a savedSELECT/GET-LISTlist would be)- left blank, to export whatever list is already active on that file from an earlier
SELECT/GET-LISTyou ran yourself before starting WTD
- Attributes to transfer — a comma-separated list of attribute numbers and/or dictionary field names, in the order you want them as columns.
*means every attribute with item-id first;+means every attribute without the item-id; an explicit0in a list means "put the item-id here." Column headers (see next prompt) use the dictionary name for a named entry or "Attribute<n>" for a numeric one. - Target file name — the name of the file that lands on your PC. The extension picks the format:
.xlsxor.xlsproduce a real Excel workbook; anything else produces a CSV. - Generate Header Record? — Y adds a first row of column labels. If your attribute list was
*, the header row is just a single*, matching the same convention other versions use for that case. - Explode MultiValue Fields? — Y gives every multivalue its own row (single-valued attributes repeat on each row that came from exploding a multivalued one alongside them); N (default) joins a field's multiple values into one cell, separated by semicolons.
- Field delimiter — Tab or Comma (default) for the CSV's own field separator. Only applies to CSV output; an Excel file has no such setting.
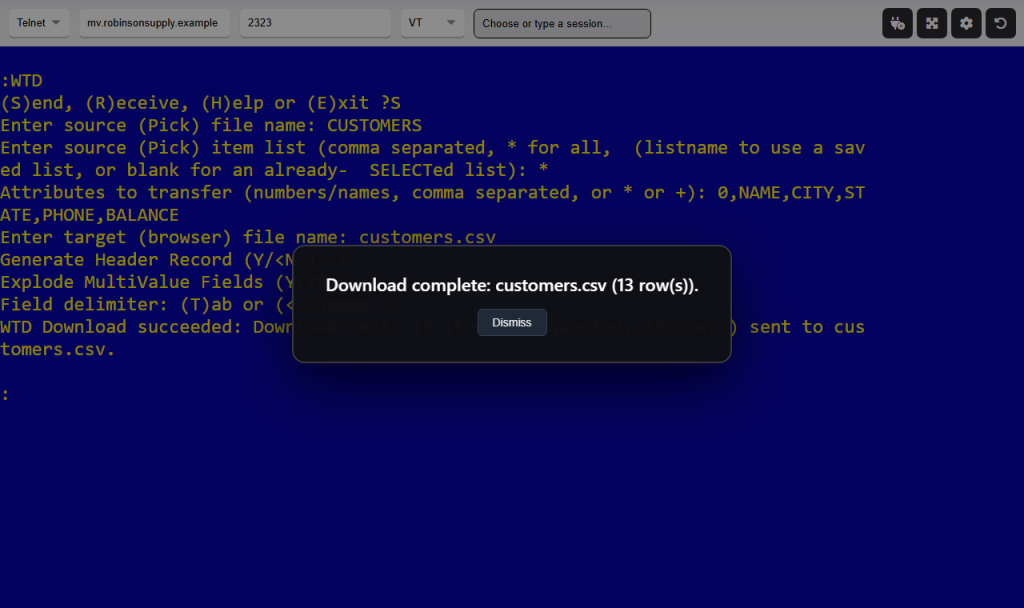
Once you answer everything, a popup on the terminal screen tracks progress ("Download in progress" → "Download complete: filename (N row(s))."), and the file itself lands wherever your browser normally saves downloads. The popup stays up until you click Dismiss, so you always get positive confirmation even for a transfer that finishes in the blink of an eye.
Upload (Receive)
Answering R offers a second choice — which shape of import you want:
B/BULK(the default if you just press Enter) — many items, one CSV row per item, matching the shape other versions use for import.S/SINGLE— this app's own shape: a single item, one CSV row per attribute of that item, with the row's columns becoming the multivalues within that attribute.
Single-item upload prompts for: target file, target item-id, and whether to overwrite an existing item. Once you answer, the browser opens a file picker; choose your CSV and the upload streams in, attribute by attribute.
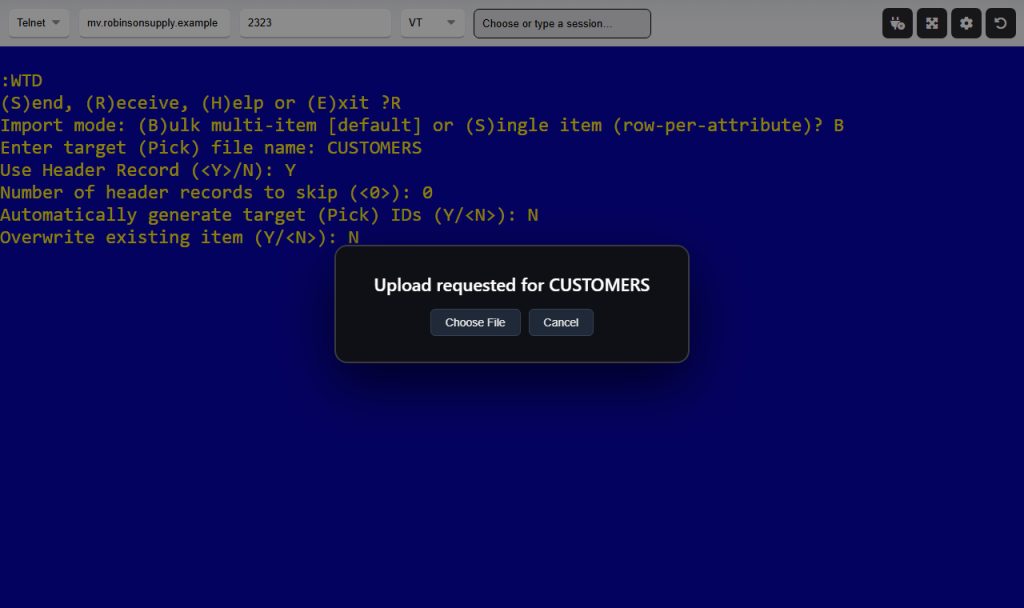
Bulk upload prompts for:
- Target file.
- Use Header Record? — Y (the default) means the CSV's own first row tells WTD which attribute each column belongs to (same numbers/names/
*vocabulary as the download attribute list, including0for item-id). N means you supply that mapping yourself in the next prompt instead. - Attributes to transfer — only asked when you answered N above; same syntax as the header row would have used.
- Number of header records to skip — extra junk rows at the top of the file to ignore before the header/data begins (0 by default).
- Automatically generate item-ids? — Y generates a sequential id (a constant prefix plus a starting number, asked next) for any row that doesn't otherwise supply one via a mapped
0column. If you say N and a row doesn't have an item-id either way, that row is skipped rather than failing the whole import — the final message tells you how many rows were skipped and why. - Overwrite existing items?
Like download, the browser shows a progress popup through file selection, processing, and upload, ending in a dismissible result: for single-item upload, "Upload completed. N attribute(s) written…"; for bulk, a breakdown of how many items were written vs. skipped and why (no item-id, or already existed with overwrite off).
You can cancel from the initial file-picker prompt without affecting anything on the host.
File format notes
- Uploads accept standard CSV: comma-separated, double-quote-quoted fields, embedded commas/quotes inside quoted fields.
- Downloads produce CSV by default, or a real binary Excel file (not just CSV with an
.xls/.xlsxname) when you name the target file with either extension.
Calling WTD from your own programs
If you're writing an application that needs to trigger a transfer without any chance of an interactive prompt, you have two options:
CALLthe underlying subroutine directly —WTD.DOWNLOAD,WTD.UPLOAD, orWTD.UPLOAD.BULK— each is a plain, fully non-interactive subroutine; see the parameter comments at the top of each program (installed alongsideWTDitself) for the exact argument list.WTD.UPLOADandWTD.UPLOAD.BULKsetPROMPT ""while they read the uploaded rows, and the setting stays in effect after they return, so set your own prompt character again afterwards if your program relies on it.EXECUTEtheWTDmainline itself with every positional argument supplied, e.g.EXECUTE "WTD S CUSTOMERS * 0,CUSTNAME customers.csv Y N" CAPTURING REPLY— since every value is present, it runs straight through with no prompts.
Installing the Host Programs
Both WCE and WTD need their MV BASIC programs installed on your host account before they'll work — they're separate program files, so you can install one without the other.
From the browser (recommended)
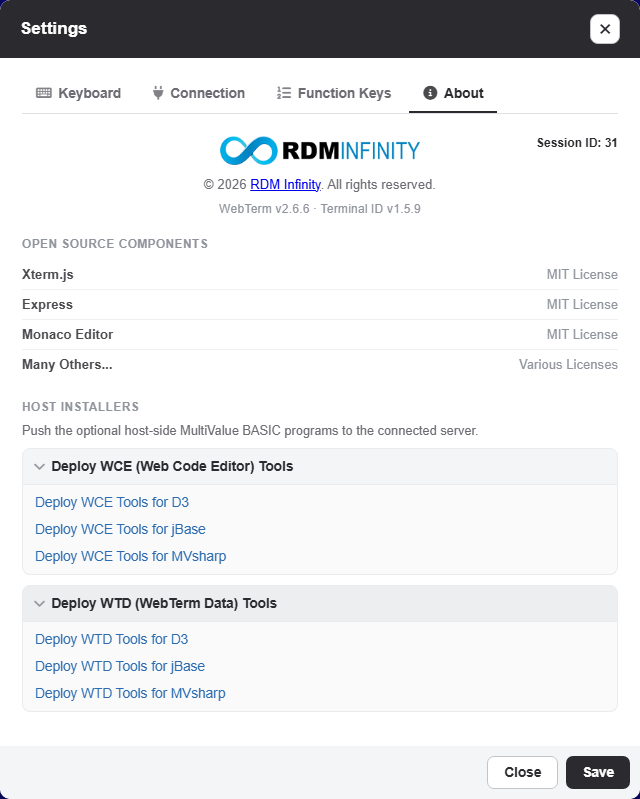
Open Settings → About, and you'll find two expandable sections near the bottom:
- "Deploy host tools to remote server" — installs WCE. Expand it and choose your host's flavor: D3, jBase, or MVsharp.
- "Deploy WTD (WebTerm Data) tools to remote server" — installs WTD, with the same three flavor choices.
Clicking a link streams the matching install script straight into your current terminal session over the socket, exactly as if you'd pasted it in yourself at TCL — no separate upload step. Once it finishes, the Settings panel closes automatically.
Make sure you're sitting at a TCL/ECL command prompt (not, say, mid-way through another program) before clicking, since the install script is typed into whatever's currently listening for input.
Manually
Each install script is also available as a plain downloadable file, if you'd rather review it first or paste it by hand. Each feature has one install script for every host type: downloads/DeployWCE.txt for WCE and downloads/DeployWTD.txt for WTD.
Before pasting a script by hand, replace its placeholders. The browser install does this for you.
| Placeholder | D3 | jBase | MVsharp |
|---|---|---|---|
{{CREATE_FILE}} (first line), WCE |
CREATE-FILE WTS 3 11 |
CREATE-FILE WTS |
CREATE-FILE WTS TYPE=DIRECTORY |
{{CREATE_FILE}} (first line), WTD |
CREATE-FILE WTD.BP 3 11 |
CREATE-FILE WTD.BP |
CREATE-FILE WTD.BP TYPE=DIRECTORY |
{{PLATFORM}} (WCE only) |
D3 |
JBASE |
MVSHARP |
Get to a TCL prompt on the account where you want the tools installed, then paste the whole file's contents in. Each script creates its own program file (WTS for WCE, WTD.BP for WTD), pastes in every program the feature needs, and compiles and catalogs each one — cataloging is what makes them callable by name from any account that has access to it, not just the one you installed on.
What gets installed
WCE installs two programs in file WTS: WCE itself, and WT.TEST, a menu-driven test program that exercises each WebTerm host feature. WCE also creates a small WCE.CONTROL settings item the first time it runs (see WCE.CONTROL settings).
WTD installs six items in file WTD.BP:
WTD— the mainline program you actually run from TCL.WTD.DOWNLOAD,WTD.UPLOAD,WTD.UPLOAD.BULK— the three subroutines that do the real work, independently callable from your own programs (see Calling WTD from your own programs).WTD.RESOLVE.ATTRS,WTD.INGEST.ROWS— shared internal helpers used by the above; you shouldn't need to call these directly.
Re-installing / updating
Re-running an install script for either feature is safe — it clears and re-pastes each item's source before recompiling and re-cataloging it, so you can use the same install flow to pick up a newer version later. WCE's WCE.CONTROL settings are kept as they are.
Embedding WebTerm in an iframe
WebTerm can be embedded as a bare terminal inside another page's <iframe>, with the header/toolbar and Settings modal removed entirely — useful for surfacing a terminal inside an internal portal, kiosk app, or another product's UI without WebTerm's own chrome around it.
Turning it on
Add embed=1 to the terminal URL, e.g.:
https://your-webterm-host/index.html?embed=1&host=10.0.0.5&port=23&protocol=telnet&termType=vt100&connectOnLoad=trueembed=1hides#controls(the toolbar) and the Settings modal permanently — unlike Settings → Connection → Display → "Auto-Hide Toolbar", nothing brings them back, including moving the mouse near the top edge. There's no in-page way to open Settings or click Connect once embedded.- There's no Connect button in embed mode, so pass
connectOnLoad=true, plus the connection fields it needs (host,port,protocol,termType, etc.), so the session starts itself. - Any other setting normally reached from the Settings modal (colors, function keys, custom rows/columns, and so on) can be set the same way. See Section 3 for the full field list, or build the link with the Dashboard's URL Builder tab and add
&embed=1to the result by hand. - Every other URL — anything without
embed=1— behaves exactly as before; this is opt-in per link, not a server-wide mode.
The admin Dashboard is never embeddable
dashboard.html (and its underlying API routes) refuses to render inside a frame at all, from any origin, embed mode or not — the server sends the response headers that tell every browser to block it. This is intentional: an embedded WebTerm is meant to expose the terminal only, never the session-monitoring/admin surface, and there's no way to reach the Dashboard from inside an embedded terminal page to begin with.